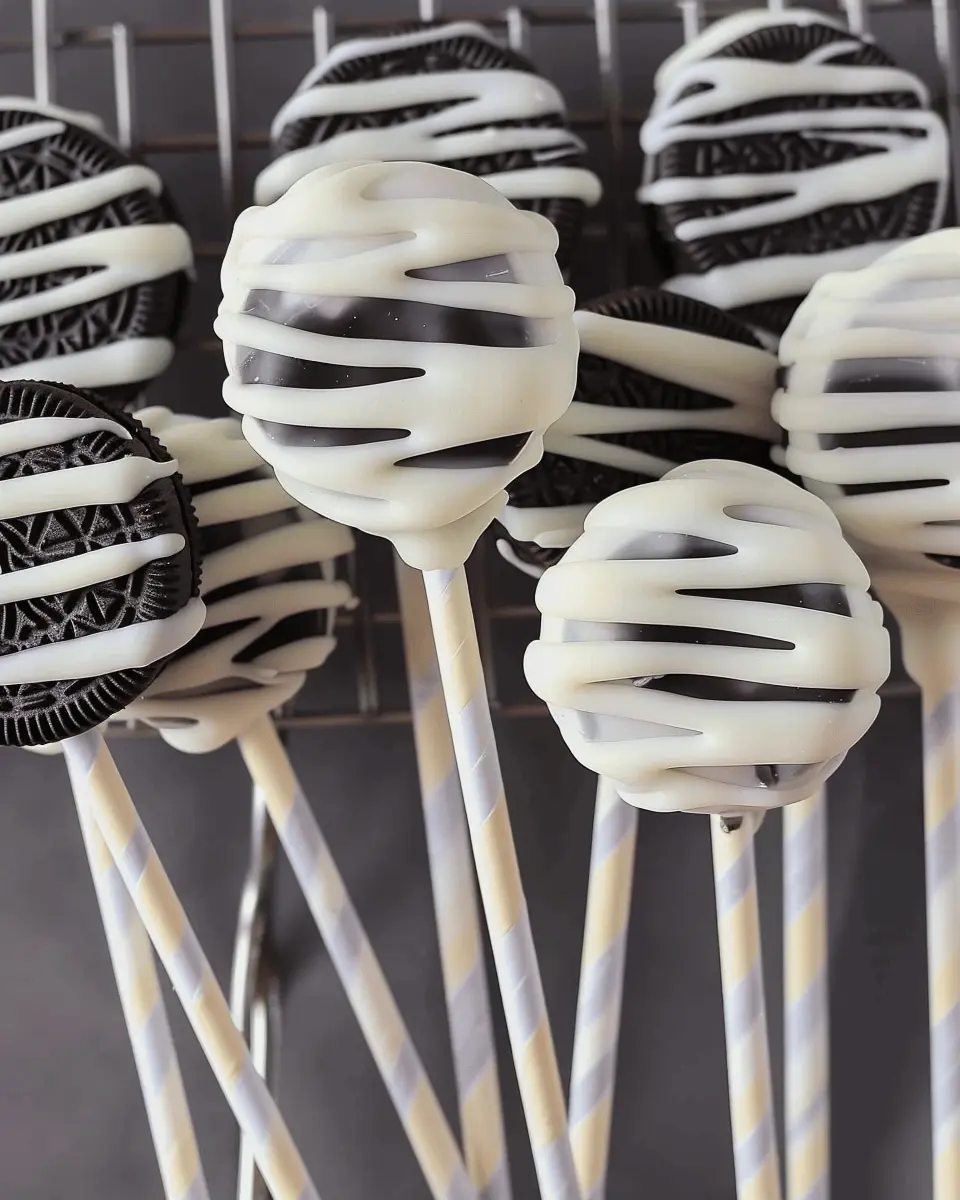
Introduction to Mummy Oreo Pops
As Halloween approaches, the search for the perfect treat can feel like an endless scavenger hunt. Enter Mummy Oreo Pops: a sweet sensation that’s not only fun to make but also delightful to eat! These cute, spooky snacks combine the beloved Oreo cookie with some creative flair, making them ideal for any gathering—whether you’re hosting a party or simply wanting to impress your co-workers.
Why Mummy Oreo Pops are the Perfect Treat for Young Professionals
Let’s face it: life as a young professional can often feel overwhelming. Between juggling deadlines and managing social commitments, finding time to whip up elaborate treats can be a challenge. Luckily, Mummy Oreo Pops are here to save the day! This recipe is quick, simple, and requires minimal ingredients. You can have a batch ready in less than an hour, leaving you with plenty of time for your other responsibilities.
In addition to being time-efficient, these pops are also incredibly versatile. With just a few adjustments, you can easily adapt them to cater to your taste. Want to impress your friends with creative toppings? Throw on some sprinkles or drizzle, or even use colored candy melts for a festive spin. The options are endless—your inner artist will thank you!
A fun fact: according to the National Retail Federation, approximately 70% of Americans participate in Halloween festivities each year, spending an average of $92 on treats and decorations. Why not contribute to that festive spirit with a treat that’s both delectable and visually appealing? Plus, with a quick search online, you can find more inspiration for Halloween-themed treats that perfectly complement your Mummy Oreo Pops.
Not only are these pops a hit among friends, but they also make great additions to office gatherings. Imagine walking into the break room with a tray of these adorable goodies, instantly brightening everyone’s day. So, let your creative juices flow, and let’s dive into the world of Mummy Oreo Pops! Your colleagues—and taste buds—will be ever so grateful.
Ingredients for Mummy Oreo Pops
When it’s time to get festive, these Mummy Oreo Pops are the perfect treat to whip up. They’re not just fun to make, but also a delightful way to get into the spirit of any celebration, whether it’s Halloween or just a fun gathering. Here’s what you’ll need to create these charming little mummies!
Essential ingredients you’ll need
- Oreo Cookies: The star of the show! Choose your favorite flavor to give it a twist.
- White Chocolate Melts: For that creamy coating that resembles mummy wrappings. You can find these at your local store or online.
- Lollipop Sticks: Essential for making these pops easy to hold and display.
- Edible Eyes: You can buy these from baking supply stores or create your own using small chocolate chips.
- Sprinkles or Drizzle: Optional, but they add an extra touch of fun! Consider using colored sprinkles to match the occasion.
By gathering these ingredients, you’ll be well on your way to creating adorable Mummy Oreo Pops that everyone will love. So, are you ready to impress your friends with this simple yet creative treat?
Step-by-step Preparation of Mummy Oreo Pops
Mummy Oreo Pops are the perfect combination of spooky fun and deliciousness, making them a fantastic treat for Halloween gatherings or school parties. This straightforward recipe is sure to impress friends, family, and colleagues alike. Let’s dive into the preparation process!
Break Apart the Oreos
The first step in creating your delightful Mummy Oreo Pops is to break apart the Oreos. You’ll need to use double-stuffed Oreos for this recipe, as the creamy filling will help hold the pops together better.
- Gently twist the cookies apart to separate the two halves.
- Scrape off a little of the filling if you want a thinner pop, but leaving it thick will help with stability.
- If you’re feeling a bit adventurous, consider experimenting with flavored Oreos, like mint or pumpkin spice, to add a unique twist.
Melt the Chocolate
Next up is the melting of the chocolate. You can use white chocolate or candy melts for this step, ensuring you have a spooky color for the mummies.
- Use a microwave-safe bowl to melt the chocolate. Heat it in 30-second increments, stirring in between to avoid scorching.
- If you want a smoother consistency, add a teaspoon of vegetable oil or shortening as the chocolate melts.
- For a more festive vibe, you could even add a drop of food coloring to tint the chocolate.
Assemble the Oreo Pops
Now that you’ve got your Oreos and melted chocolate ready, it’s time to assemble the Mummy Oreo Pops.
- Take lollipop sticks or cake pop sticks and gently insert one stick into each Oreo half, making sure not to push too hard, so the cookie doesn’t crumble.
- Reattach the Oreo halves, ensuring the stick is secured within the cream filling.
- If you prefer a little extra stability, you can place a dot of melted chocolate on the inside before squishing the halves back together.
Dip the Pops in Chocolate
Time to dip those assembled pops into the melted chocolate! This step transforms the Oreos into mummy-like treats.
- Hold the stick and gently dip each Oreo pop into the melted chocolate until completely covered.
- Allow any excess chocolate to drip back into the bowl.
- Place the dipped pops upright in a block of styrofoam or a cupcake holder to ensure they don’t touch each other while they set.
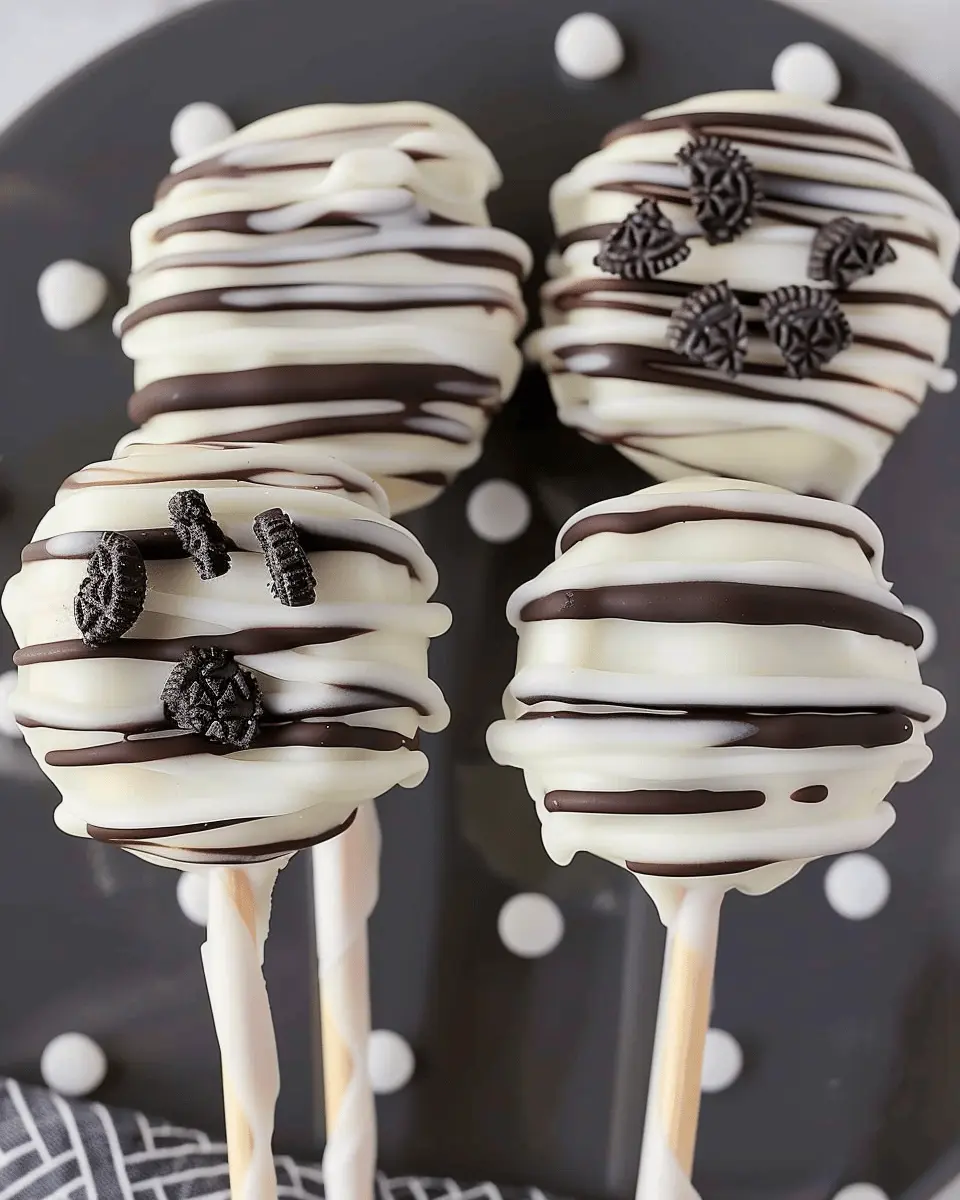
Decorate with Drizzled Chocolate and Eyeballs
Now comes the part where your creativity shines! Once the chocolate coating has set just a bit but is still soft, you can drizzle more melted chocolate to create a mummy’s bandages.
- Use a piping bag or a plastic zip-top bag with the corner snipped off to drizzle chocolate back and forth over the pops.
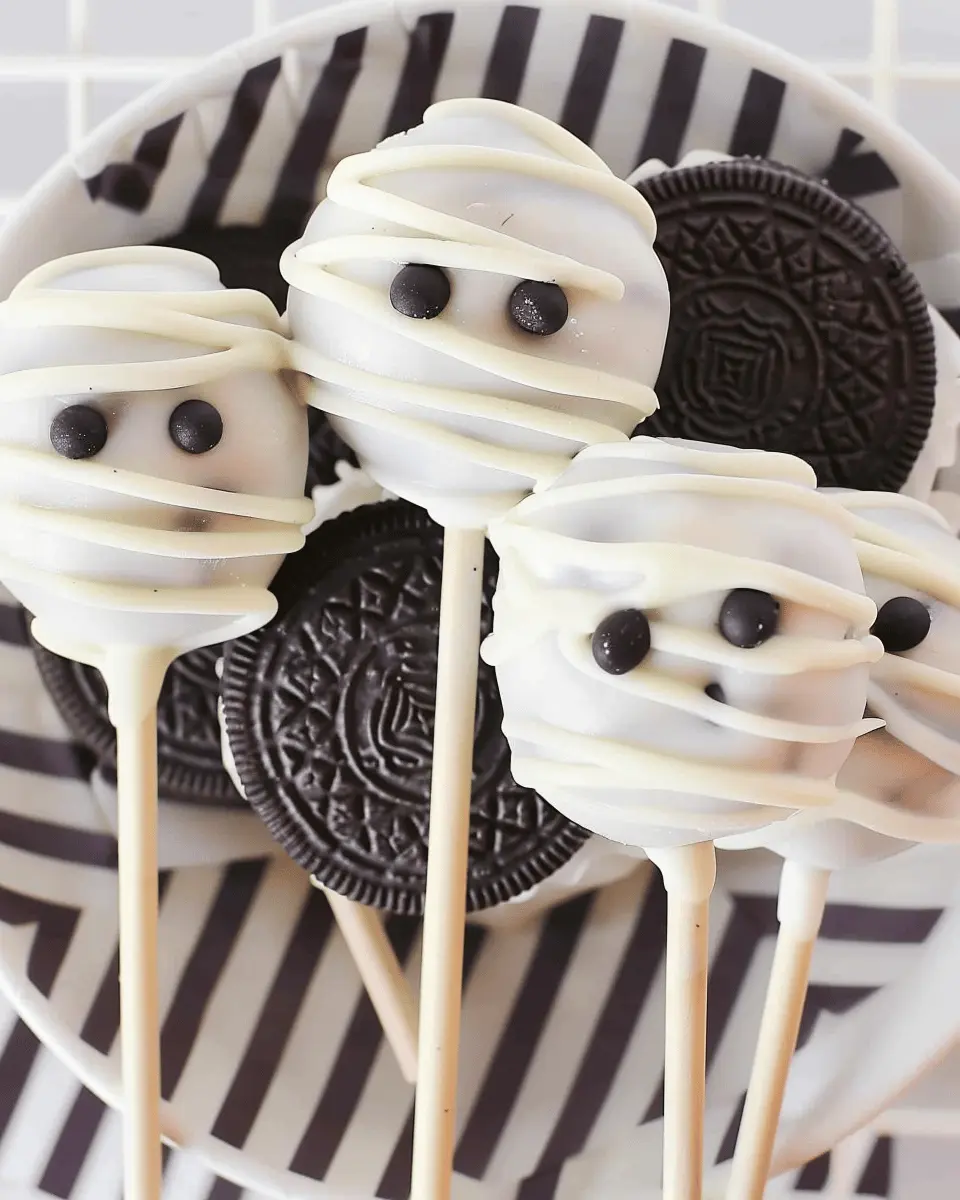
- To finish off your Mummy Oreo Pops, place candy eyeballs on the top while the chocolate is still soft, so they stick nicely.
- This step adds a touch of personality and whimsy to your spooky snacks.
Chill and Set the Pops
Let those Mummy Oreo Pops chill in the refrigerator for about 15–20 minutes. This chilling period allows the chocolate to set, ensuring your pops maintain their shape.
- If you’re in a hurry, placing them in the freezer for five minutes can also do the trick.
- This is a great time to clean up your workspace and prepare for the final touches.
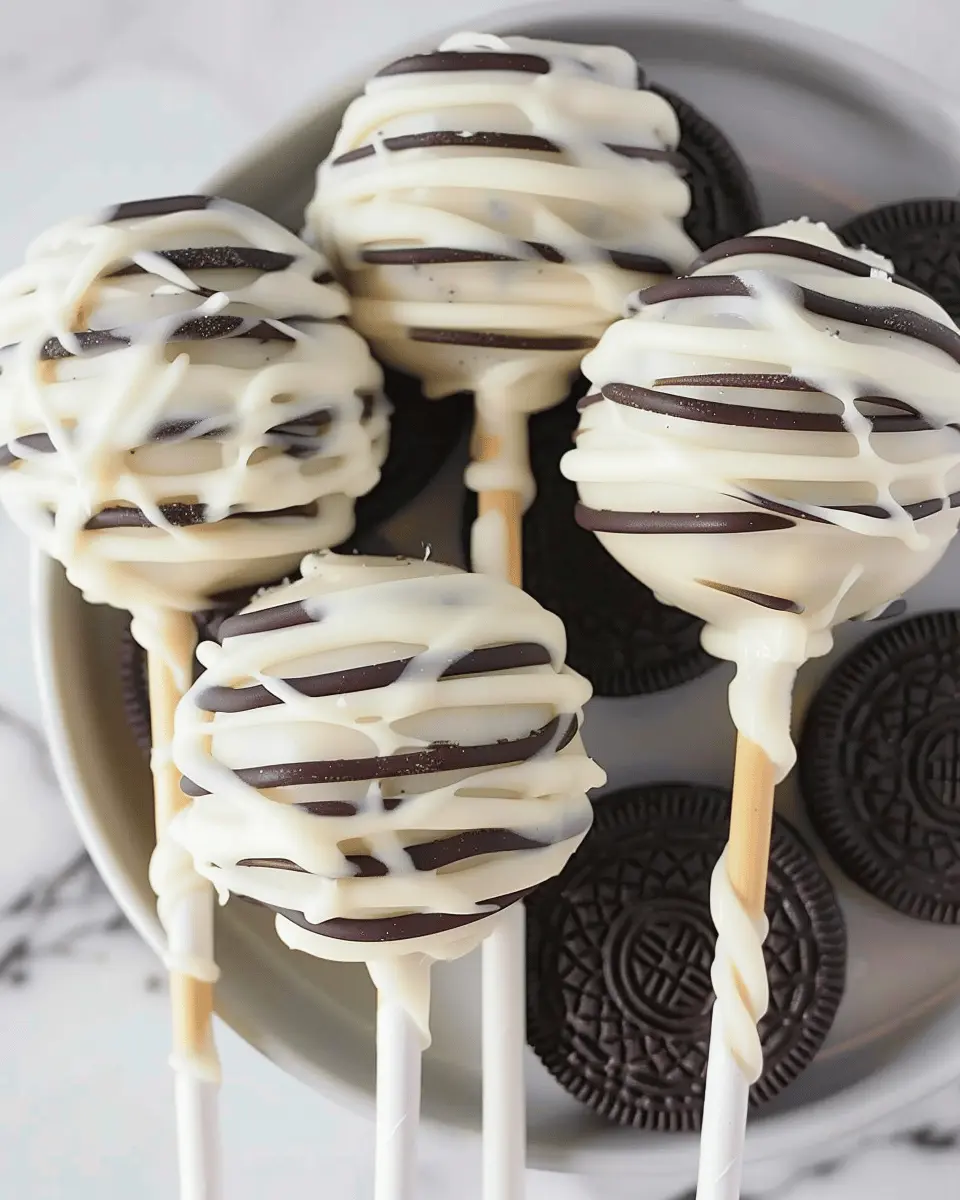
Package for Enjoyment
Once your Mummy Oreo Pops are fully set, it’s time to present them for enjoyment!
- Wrap each pop in a small cellophane bag and tie it with a cute ribbon for extra flair.
- These also make fantastic party favors! Consider a fun label or tag that says “Mummy Oreo Pops” to give a personalized touch.
Don’t forget to snap a photo of your masterpiece to share on social media or your favorite recipe platform. Making Mummy Oreo Pops is not only fun but also a delightful activity to share with friends and family! Check out this tutorial for more creative Halloween snacks and treats. Enjoy your spooky celebration!
Variations on Mummy Oreo Pops
Different Types of Cookies to Use
While traditional Oreos are a fantastic choice for Mummy Oreo Pops, don’t hesitate to get creative! Here are a few alternatives that can add a unique twist to your spooky treats:
- Chocolate Sandwich Cookies: Try using other chocolate sandwich cookies like Chocolate Coated Digestives. They have a similar taste and texture, making them ideal for mummy-making.
- Ginger Snap Cookies: For a spicier flavor profile, ginger snap cookies bring a delightful zing that pairs surprisingly well with chocolate.
- Homemade Cookies: If you’re feeling adventurous, whip up a batch of your favorite homemade cookies. The freshness can elevate your mummy pops to a new level.
Alternative Chocolate Melting Methods
Melting chocolate doesn’t have to be a chore. Here are some alternative methods to make your Mummy Oreo Pops a breeze:
- Microwave Method: This is the quickest way. Place chocolate chips in a microwave-safe bowl, heat them in 30-second intervals, stirring in between until smooth.
- Double Boiler: For a more controlled melting process, set up a double boiler. Just fill a pot with water, bring it to a simmer, and place a heat-safe bowl on top with your chocolate.
- Crock-Pot Melting: If you’re making a large batch, consider using a Crock-Pot. Set it on low, add your chocolate, and stir occasionally for perfectly melted chocolate without the risk of burning.
Whichever method you choose, the key is to remain patient and keep that chocolate silky smooth. Happy crafting! For more tips on cookie variations, check out Food52 for inspiration.
Cooking Tips and Notes for Mummy Oreo Pops
How to Achieve the Perfect Chocolate Dip
When it comes to making Mummy Oreo Pops, the chocolate dip is crucial. Start by melting high-quality chocolate or candy melts, as these provide a smooth coating. To achieve that velvety finish, consider using a double boiler or a microwave in short bursts, stirring in between. This prevents overheating and helps maintain a glossy texture. Once your chocolate is melted, allow it to cool slightly before dipping your Oreo pops to ensure a smoother application.
Keeping Your Pops Fresh
Keeping your Mummy Oreo Pops fresh can be a challenge, but with a few tips, they can last longer! Store them at room temperature in an airtight container to prevent moisture buildup. Ideally, they should be consumed within a week for the best taste and texture. If you need to store them for longer, consider freezing them. Just make sure to wrap them individually in plastic wrap to avoid freezer burn.
For more expert method insights, you can check sources like The Food Network or Taste of Home. Happy baking!
Serving Suggestions for Mummy Oreo Pops
Creative Ways to Present Your Pops
When it comes to serving Mummy Oreo Pops, creativity can turn a simple treat into a spooky sensation. Consider using a cake stand covered in a black or spooky-themed cloth to elevate the presentation. A small, decorated platter can also work wonders. For an extra touch, surround the pops with faux spider webs or plastic spiders, setting the mood for Halloween gatherings. You might even dip the end of each stick in white chocolate and sprinkle it with edible glitter for that extra sparkle—why not make your treats sparkle?
Pairing Ideas with Beverages
To complement these delightful pops, think of serving them with warm drinks like hot chocolate or spiced apple cider. Their sweet flavors balance beautifully with the rich, creamy undertones of your favorite hot bevvy. For something tropical, consider pairing with a refreshing iced fruit tea; it adds a burst of flavor and keeps things light and fun.
For more pairing inspiration, check out resources like Serious Eats. Your guests will love the thought you put into these pairings!
Time Breakdown for Making Mummy Oreo Pops
Preparation Time
Getting started on your Mummy Oreo Pops is a breeze! You’ll need about 15 minutes for preparation. This includes unwrapping your Oreos, melting the chocolate, and getting everything set up for coating. Want an efficient method? While the chocolate melts, you can get your popsicle sticks ready, so you’re prepared to plunge right into the fun!
Cooling Time
After you’ve dipped those delicious Oreos in chocolate, allow them to cool and set for about 30 minutes. This step is crucial for achieving that perfect coating and ensuring your Mummy Oreo Pops keep their shape. You could set them in the refrigerator for a quicker cool, but keeping them at room temperature works just fine, too!
Total Time
In total, you’re looking at about 45 minutes from start to finish. It’s a quick and delightful project that brings out the Halloween spirit! Whether you’re making these for a party or just to enjoy at home, you’ll find this recipe simple and satisfying. For similar fun ideas, check out this Halloween recipes guide. Happy popping!
Nutritional Facts for Mummy Oreo Pops
When you’re whipping up some delightful Mummy Oreo Pops, it’s essential to know what you’re indulging in. These treats are not just fun and festive; they come with their own set of nutritional facts to consider!
Calories per Pop
Each Mummy Oreo Pop packs about 120 calories. This makes them an ideal small treat when you’re searching for a quick sweet escape without derailing your diet. Moderation is key, especially around the holidays!
Sugars and Fats
In a single pop, expect to find approximately 7 grams of sugar and about 5 grams of fat. While this isn’t excessive, it’s always a good idea to be mindful of your intake, particularly if you’re enjoying multiple pops at a gathering. To keep them slightly healthier, consider using dark chocolate for coating, which can reduce sugar intake while adding a rich flavor.
For additional insights, the U.S. Department of Agriculture recommends monitoring added sugars as part of a balanced diet, especially for snacks like these. Check out resources from the American Heart Association for more tips on smart snacking!
Enjoying your Mummy Oreo Pops during festive gatherings can be guilt-free when you keep these nutritional facts in mind!
FAQs about Mummy Oreo Pops
Creating Mummy Oreo Pops can spark some curious questions. Here are the answers to some of the most common inquiries.
Can I use dark chocolate instead of white?
Absolutely! While traditional recipes call for white chocolate to achieve that ghostly appearance, dark chocolate can be a fantastic alternative. It not only brings a rich flavor but also allows for beautiful contrast in color. Just melt it down as you would the white chocolate and dip your Oreos in. You can even sprinkle a little sea salt on top for an added flavor twist. It’s all about experimenting with what’s available to you!
How long will the pops stay fresh?
Your delightful Mummy Oreo Pops can typically stay fresh for up to a week when stored in an airtight container at room temperature. However, for optimal taste and texture, try to enjoy them within the first few days. If you need to make them in advance, storing them in the fridge can help extend their life a little longer, but be mindful that this might affect the candy coating’s texture.
Are there any egg-free options for Mummy Oreo Pops?
Yes, you’ll be glad to know that Mummy Oreo Pops are naturally egg-free! The core ingredients include Oreos and chocolate—which means you can indulge in this treat while being mindful of dietary restrictions. If you’re looking for alternatives to pair with your pops, consider using vegan chocolate melts and organic Oreos for a fully plant-based version.
For more tips on vegan desserts, check out resources from The Vegan Society. They provide a wealth of information for those interested in expanding their culinary horizons.
Please let me know if you have more questions or need further guidance!
Conclusion on Mummy Oreo Pops
Recap of Why You Should Try Making These Treats
Incorporating Mummy Oreo Pops into your holiday celebrations adds a delightful twist to traditional treats. Not only are they simple to make, but they also bring a fun, festive atmosphere to any gathering. With just a handful of ingredients and minimal effort, you can whip up delicious, eye-catching snacks that are sure to impress your friends and family.
These pops are perfect for parties, school events, or even a cozy night in while watching horror films. Plus, crafting these delightful morsels can be a fun activity to enjoy with loved ones. So why not embrace your inner creative chef this season? You won’t regret it! For more fun recipes, check out Food Network or Delish.
PrintMummy Oreo Pops: Easy and Fun Halloween Treats Your Kids Will Love
These Mummy Oreo Pops are a fun and easy Halloween treat that your kids will love to make and eat!
- Prep Time: 20 minutes
- Cook Time: 5 minutes
- Total Time: 25 minutes
- Yield: 12 pops 1x
- Category: Dessert
- Method: No bake
- Cuisine: American
Ingredients
- 12 Oreo cookies
- 1 cup white chocolate chips
- 1 tablespoon vegetable oil
- 1/2 cup candy eyes
- 1/4 cup black decorating icing
Instructions
- Melt the white chocolate chips and vegetable oil together.
- Dip each Oreo in the melted chocolate, and place them on wax paper.
- Before the chocolate sets, place two candy eyes on each Oreo.
- Using the black icing, pipe a bandage design on each mummy.
- Let the chocolate set completely, then serve and enjoy!
Notes
- These can be made a day in advance.
- Store in an airtight container to keep fresh.
Nutrition
- Serving Size: 1 pop
- Calories: 120
- Sugar: 10g
- Sodium: 50mg
- Fat: 7g
- Saturated Fat: 4g
- Unsaturated Fat: 2g
- Trans Fat: 0g
- Carbohydrates: 15g
- Fiber: 0g
- Protein: 1g
- Cholesterol: 5mg
Keywords: Mummy Oreo Pops, Halloween treats, kids recipes