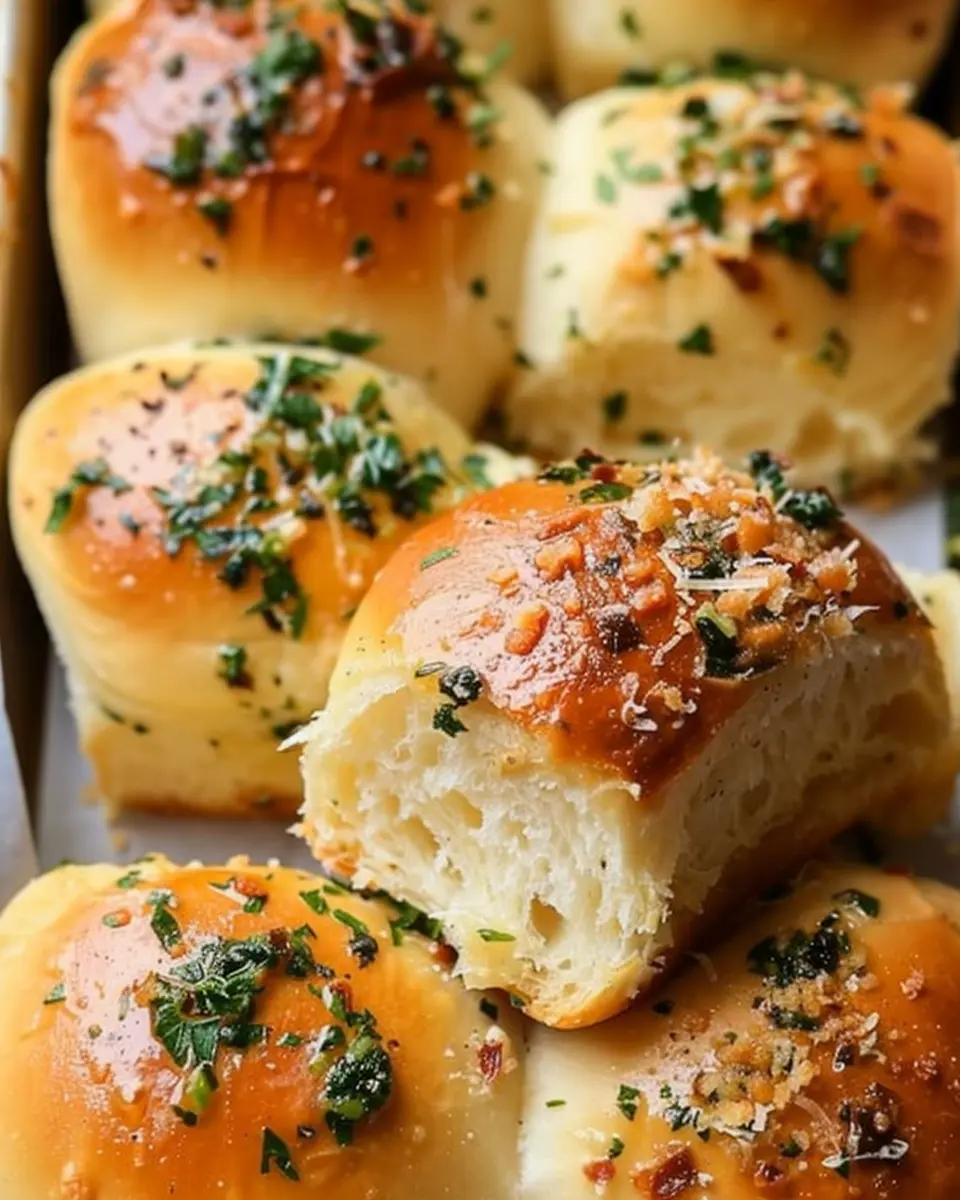
Introduction to Garlic Bread Rolls
Nothing quite compares to the aroma of freshly baked garlic bread rolls. Whether you’re preparing a cozy dinner for friends or simply treating yourself, these delightful rolls are a perfect addition to any meal. Let’s dive into the enticing world of these fluffy treasures and discover what makes them so special.
Why Homemade Garlic Bread Rolls?
When it comes to comfort food, nothing symbolizes warmth and togetherness quite like homemade garlic bread rolls. But why opt for homemade rather than store-bought options? Here are a few compelling reasons:
-
Flavor: Homemade rolls present a fresh taste that pre-packaged ones rarely match. You can control the amount of garlic (and butter, of course) to achieve the perfect flavor for your palate. According to the Culinary Institute of America, using fresh ingredients can elevate your dishes from mundane to memorable.
-
Customization: When you make your rolls at home, you’re free to experiment. Want to add herbs like parsley or basil to your garlic butter? Go ahead! Perhaps you want to try incorporating some grated cheese into the dough — the sky’s the limit! Sites like Food52 offer countless ideas for customizations.
-
Healthier Options: Often, store-bought bread relies on preservatives to extend shelf life. By making your garlic bread rolls from scratch, you can limit unnecessary additives and choose healthier ingredients. Checking the nutrition labels on store-bought alternatives usually reveals hidden sugars and unhealthy fats. When you control the ingredients, it’s easier to enjoy guilt-free indulgence.
-
Bonding Experience: Baking can be a wonderful way to connect with friends or loved ones. Why not gather a couple of friends for a cozy baking night? This hands-on activity fosters laughter, collaboration, and of course, delicious smells wafting through your home.
In a world awash with quick-fix meals, making your garlic bread rolls stands out as a gratifying culinary experience. Not only will your tastebuds rejoice, but you’ll also gain invaluable kitchen skills in the process. So, let’s roll up our sleeves and get started on creating these heavenly bites!
Ingredients for Garlic Bread Rolls
Essential ingredients for the perfect rolls
Crafting the perfect garlic bread rolls begins with a few essential ingredients that come together to create a savory delight. Here’s what you’ll need:
- All-purpose flour – This is the base of your rolls, providing the perfect texture.
- Active dry yeast – Helps the rolls rise, giving them that pillowy softness.
- Warm water – Activates the yeast and brings the dough together.
- Salt – Enhances the flavor of your rolls.
- Butter – Adds richness and a touch of moisture.
- Garlic – The star of the show, delivering that aromatic kick we all love.
- Parsley – A fresh herb that adds a lovely color and subtle flavor.
These ingredients create a classic foundation for any garlic bread rolls. For tips on selecting quality flour, check out King Arthur Baking.
Optional ingredients for extra flavor
Want to take your garlic bread rolls to the next level? Consider adding these optional ingredients for an extra boost of flavor:
- Parmesan cheese – A sprinkle will add a deliciously cheesy crust.
- Italian seasoning – Perfect for those who love a herby touch that complements the garlic.
- Turkey bacon or chicken ham – For a savory delight nestled right inside your rolls, these ingredients add a delightful twist.
Feel free to mix and match these ingredients to create a unique version that suits your taste. Whether you’re making a simple side dish or elevating your dinner party, the right combination will surely impress your guests!
Preparing Garlic Bread Rolls
Making your own garlic bread rolls is easier than you might think! This warm, buttery treat is perfect for family dinners or gatherings with friends. Let’s dive into the preparation and get your kitchen smelling amazing.
Gather Your Ingredients
Before you start whipping up those delicious rolls, you’ll need to gather your ingredients. Here’s what you’ll require:
-
For the Garlic Butter:
-
1/2 cup (1 stick) unsalted butter, softened
-
4-5 cloves of garlic, minced (adjust to your taste)
-
1 tablespoon fresh parsley, chopped (optional)
-
Salt, to taste
-
For the Dough:
-
2 cups all-purpose flour
-
1 packet (2.5 teaspoons) active dry yeast
-
3/4 cup warm water (about 110°F)
-
1 tablespoon sugar
-
1/2 teaspoon salt
-
2 tablespoons olive oil
Make sure to have all these ingredients on hand before you get started. You might even want to check out a local grocery store’s online delivery service for convenience!
Make the Garlic Butter
Let’s kick things off by preparing that garlic butter. In a small bowl, combine the softened butter, minced garlic, parsley, and a pinch of salt. Mix them well until everything is combined into a creamy, flavorful paste. Feel free to taste-test—who can resist a little garlic goodness?
Mix and Knead the Dough
It’s time to get your hands a little dirty! In a large mixing bowl, combine the warm water, sugar, and yeast. Let it sit for about 5 minutes until it becomes frothy—this means your yeast is alive and ready to go! Next, add the flour, salt, and olive oil, mixing until a dough starts to form.
Transfer the dough to a floured surface and knead it for about 5-7 minutes until it’s smooth and elastic. If you’ve never kneaded dough before, just push with the heel of your hands, fold, and repeat. Isn’t it satisfying to see it come together?
Shape the Rolls
Once your dough is nicely kneaded, divide it into equal pieces—about 12 is a good number. Roll each piece into a ball, placing them on a parchment-lined baking tray. Make sure to leave some space between them, as they will expand while baking. Now, you can also brush some of that delicious garlic butter over the tops for extra flavor!
Let the Dough Rise
Cover your dough balls with a clean kitchen towel and let them rise in a warm environment for about 30-45 minutes. The rolls should about double in size. If you’re not quite sure how to find the perfect spot for rising, try placing them in an unheated oven or near a sunny window.
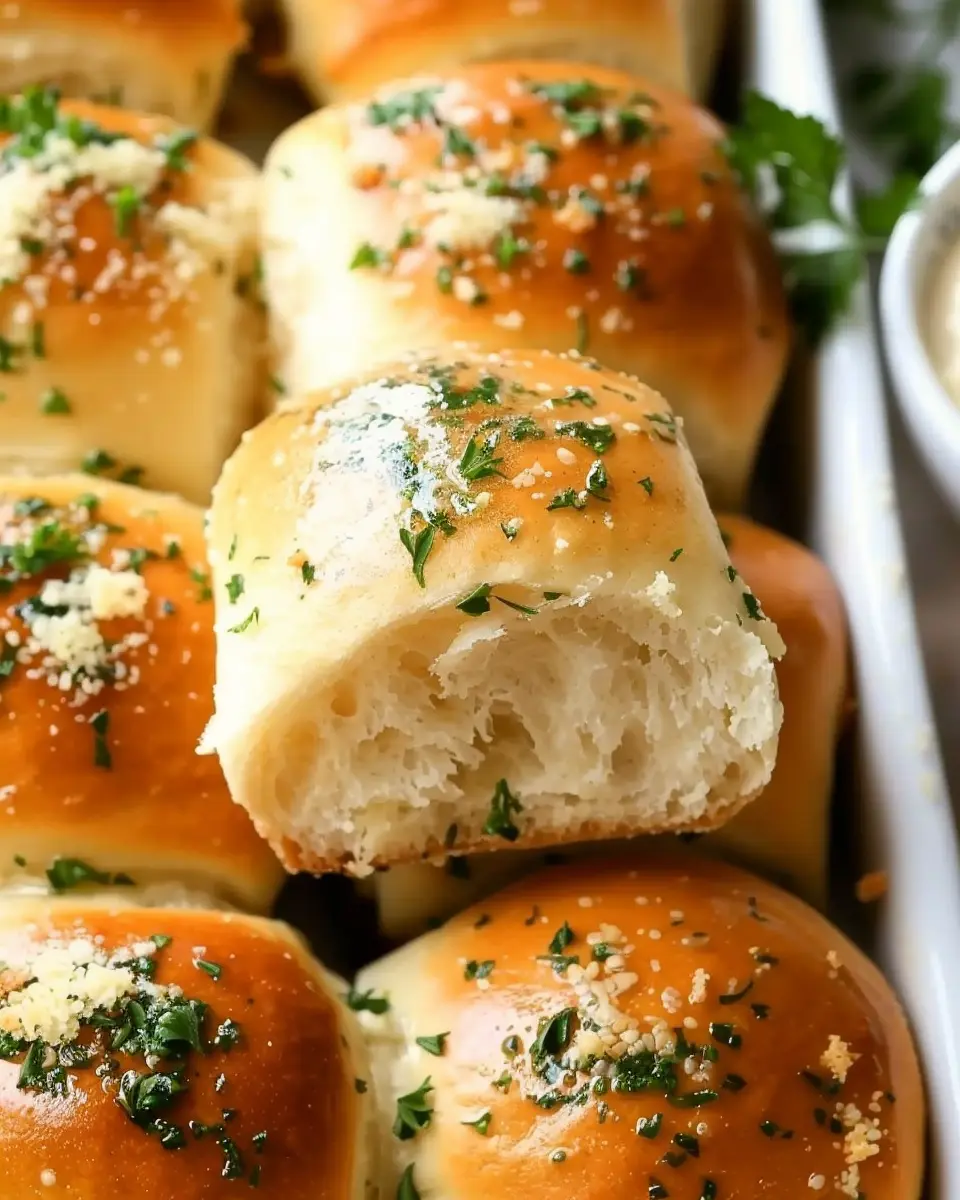
Bake the Rolls
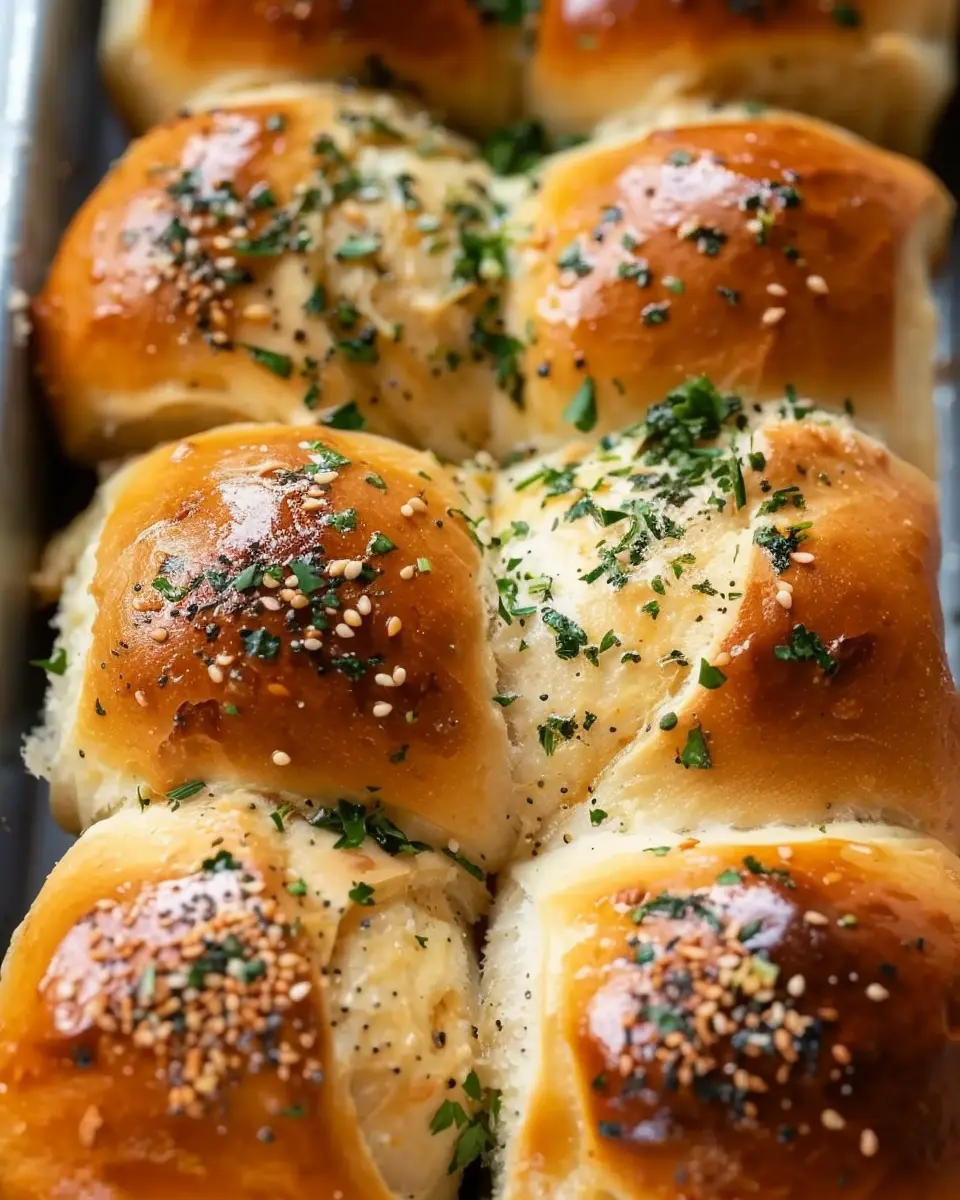
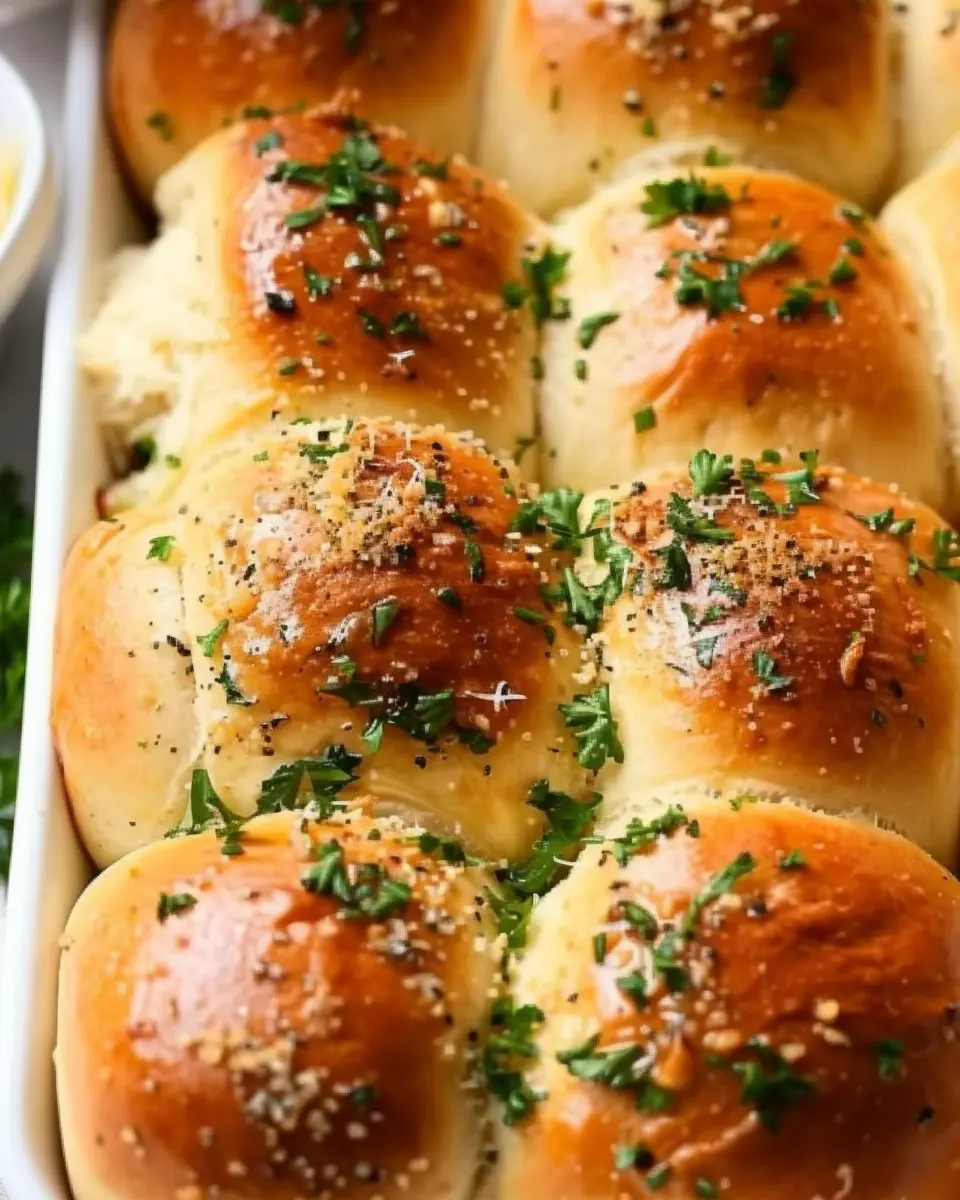
Preheat your oven to 375°F (190°C). Once your rolls have risen beautifully, pop them in the oven for about 15-20 minutes. Keep an eye on them; you want them to turn golden brown. When they are finished baking, take them out and immediately brush on the remaining garlic butter.
If you want to elevate your rolls, consider pairing them with a fresh salad or a comforting soup for a perfect meal experience.
Final Thoughts
There you have it! Homemade garlic bread rolls that are sure to impress. Not only are they straightforward to make, but they also fill your home with an irresistible aroma. So, gather your ingredients and get rolling—your taste buds will thank you! If you’re looking for more baking inspiration, be sure to check out Baker’s Journal. Happy baking!
Variations on Garlic Bread Rolls
If you’re looking to spice up your classic garlic bread rolls, you’ve come to the right place! These variations are simple yet delightful ways to add a personal touch to your beloved rolls.
Cheesy Garlic Bread Rolls
Imagine biting into a warm roll that’s oozing with melted cheese and fragrant garlic! To create these cheesy delights, simply mix a blend of your favorite cheeses, like mozzarella and cheddar, into the garlic butter before slathering it on the rolls. For an extra flavor boost, consider adding a sprinkle of red pepper flakes or chopped green onions. Don’t forget to serve these alongside a marinara dipping sauce for a delightful contrast! If you want a deliciously cheesy experience, check out this cheese guide for tips on selecting the best varieties.
Garlic Rolls with Herbs
Herbs can elevate the taste of your garlic bread rolls to a whole new level. Incorporate chopped fresh herbs such as rosemary, thyme, or parsley into the garlic butter mixture. These aromatic additions not only enhance flavor but also bring a vibrant color to the rolls. Alternatively, try adding a blend of Italian seasoning for a classic flavor profile reminiscent of your favorite Italian restaurant.
Do you have a preferred herb that you love to use in your dishes? Experimentation can lead to fantastic results, so feel free to mix and match!
Whether you choose the cheesy route, opt for fresh herbs, or combine both, these variations are sure to impress your friends and family. Happy baking!
Cooking Tips and Notes for Garlic Bread Rolls
Measuring Tips for Accuracy
When whipping up garlic bread rolls, precise measurements can make all the difference. Everybody loves the aroma of freshly baked bread, but if your proportions are off, the texture can be compromised. Consider using a kitchen scale for dry ingredients—it’s more accurate than cups and helps achieve that perfect roll consistency. If measuring by volume, remember to spoon flour into your measuring cup and level it off without packing it down.
Understanding Yeast Varieties
Choosing the right yeast is crucial for your garlic bread rolls to rise beautifully. Instant yeast rises quickly and can be mixed directly with dry ingredients, making it super user-friendly. On the other hand, active dry yeast requires proofing in warm water first to activate it, which can feel a bit old-school but adds an interesting ritual. Each type can yield delicious results, but know that instant yeast typically speeds up the process. For detailed guidance, check out resources like King Arthur Baking.
With these tips in hand, you’re on your way to crafting delightful garlic bread rolls that will impress everyone at your table. Happy baking!
Serving Suggestions for Garlic Bread Rolls
Pairing with Soups and Salads
Garlic bread rolls are the perfect complement to cozy soups and vibrant salads. Imagine a warm bowl of minestrone or a rich tomato basil soup—dipping these rolls is pure heaven! The buttery, garlicky flavor infuses each bite, adding depth to lighter dishes.
Try serving them alongside a classic Caesar salad or a zesty Greek salad to elevate your meal. For more salad ideas, check out this healthy salad guide for inspiration!
Serving as a Standalone Appetizer
If you’re hosting a gathering or just craving something indulgent, why not showcase garlic bread rolls as a standalone appetizer? Picture them served warm with a side of marinara or pesto for dipping—your guests won’t be able to resist.
These rolls also work well for casual movie nights or game day snacks. Just gather around, break apart, dip, and enjoy! If you’re feeling adventurous, try stuffing them with turkey bacon or chicken ham for an elevated twist.
With these serving suggestions, garlic bread rolls can shine in countless culinary scenarios.
Time Breakdown for Garlic Bread Rolls
When you’re craving garlic bread rolls, understanding the timing is key to achieving that perfect loaf. Here’s a handy breakdown to guide you through the process.
Preparation Time
You’ll spend about 15 minutes getting your ingredients ready and mixing them up. It’s the perfect time to enjoy a little music or podcast while you work!
Rising Time
Patience is a virtue! Allow the dough to rise for around 1 hour. This step is crucial for the rolls to become soft and fluffy. Consider checking out this guide on the science of rising dough to understand why it’s so important.
Baking Time
Once they’ve risen, pop those rolls in the oven for about 20 minutes. You’ll start to smell that delightful garlic aroma wafting through your kitchen.
Total Time
In total, you’re looking at roughly 1 hour and 35 minutes from start to finish. What’s that, just enough time to whip up a quick salad or prep a side dish? Enjoy the satisfaction of homemade garlic bread rolls that are sure to impress.
Nutritional Facts for Garlic Bread Rolls
When indulging in garlic bread rolls, knowing the nutrition profile can help you appreciate this tasty treat even more!
Calories per roll
Each garlic bread roll typically contains around 150–200 calories, making them a delightful yet moderate addition to your meal. While they’re not a low-calorie option, pairing them with a well-balanced dish can keep your diet in check.
Carbohydrates and fats
These rolls primarily offer:
- Carbohydrates: Approximately 25–30 grams, providing those much-needed energy boosts.
- Fats: About 5–10 grams, mainly from the butter and garlic, adding flavor without overwhelming your diet.
If you want to dive deeper into the nutritional benefits of garlic, check out Healthline’s article for more insights. Balancing these garlic bread rolls with lean proteins and fresh vegetables can transform your meal into a delightful feast!
FAQs about Garlic Bread Rolls
When you’re diving into the world of baking, you might find yourself brimming with questions about your delightful garlic bread rolls. Let’s tackle some common inquiries to help enhance your roll-making experience.
Can I make these rolls ahead of time?
Absolutely! You can prepare the dough for your garlic bread rolls and store it in the refrigerator for up to 24 hours before baking. Just ensure you let the dough come to room temperature before shaping and baking. This method not only saves time but also allows the flavors to develop more fully. If you’re a planner, consider baking them the night before a gathering for that freshly baked aroma.
How should I store leftover garlic bread rolls?
Leftover garlic bread rolls can be a treasure! To keep them fresh, allow them to cool completely and store them in an airtight container at room temperature. They’ll stay delicious for about two to three days. For an extra kick of flavor, you can reheat them in the oven for a few minutes to get that crispy exterior back—trust me, your taste buds will thank you!
Can I freeze garlic bread rolls?
Yes, freezing is a fantastic option if you want to enjoy the taste of garlic bread rolls later. Once they’re baked and cooled, wrap each roll tightly in plastic wrap and then place them in a freezer bag. They can be stored for up to three months. When you’re ready to indulge, just bake them straight from the freezer—no need to thaw! This way, you can have fresh rolls anytime, just like in your favorite restaurant.
For more tips on preserving the flavor of your baked goods, check out food storage guidelines from USDA and Taste of Home.
Conclusion on Garlic Bread Rolls
In wrapping up our exploration of garlic bread rolls, it’s clear they’re a fabulous addition to any meal. These rolls, with their golden-brown crust and garlic-infused softness, tantalize the taste buds and elevate even the simplest dinners. Perfect for gatherings or cozy nights in, they’re easy to whip up and pair beautifully with various dishes, from hearty soups to savory pastas.
Consider trying different fillings or toppings for a delightful twist! Garlic bread rolls not only please your palate but also add a touch of warmth and comfort to the table. Try making them yourself, and share your experiences with friends and family. For more on baking techniques, check out resources from King Arthur Baking or Food Network. Happy baking!
PrintGarlic Bread Rolls: Easy Homemade Delight You’ll Adore
Delicious and easy-to-make garlic bread rolls that you’ll love!
- Prep Time: 15 minutes
- Cook Time: 25 minutes
- Total Time: 1 hour 40 minutes
- Yield: 12 rolls 1x
- Category: Bread
- Method: Bake
- Cuisine: Italian
- Diet: Vegetarian
Ingredients
- 2 cups all-purpose flour
- 1 tablespoon sugar
- 1 teaspoon salt
- 1 tablespoon instant yeast
- 1 cup warm water
- 4 tablespoons unsalted butter, melted
- 4 cloves garlic, minced
- 2 tablespoons fresh parsley, chopped
- 1/4 cup grated Parmesan cheese
Instructions
- In a large bowl, combine flour, sugar, salt, and yeast.
- Mix warm water and melted butter together, then add to the dry ingredients.
- Knead the dough for about 5-7 minutes until smooth.
- Cover and let the dough rise in a warm place for about 1 hour.
- Preheat your oven to 375°F (190°C).
- Punch down the dough and shape into rolls.
- Place rolls on a baking sheet and allow to rise for another 30 minutes.
- Melt butter in a small saucepan and add minced garlic and parsley.
- Brush the garlic butter mixture over the rolls.
- Bake for 20-25 minutes until golden brown.
- Sprinkle with Parmesan cheese before serving.
Notes
- For extra flavor, add Italian herbs to the garlic butter mixture.
- Serve warm for the best taste.
Nutrition
- Serving Size: 1 roll
- Calories: 150
- Sugar: 1g
- Sodium: 200mg
- Fat: 7g
- Saturated Fat: 4g
- Unsaturated Fat: 2g
- Trans Fat: 0g
- Carbohydrates: 20g
- Fiber: 1g
- Protein: 4g
- Cholesterol: 15mg
Keywords: Garlic Bread Rolls, Homemade Garlic Rolls, Easy Garlic Rolls