
Introduction to Easy No-Oven Turkish Bread (Bazlama)
Making your own easy no-oven Turkish bread, or bazlama, is not only a fun cooking adventure, but it also reconnects you with the delicious simplicity of traditional Turkish cuisine. Have you ever bitten into fresh, fluffy bread that perfectly complements your meal? Imagine creating that experience right at home without needing a fully equipped kitchen or a fussy oven!
Why Try Making Turkish Bread at Home?
First, there’s something incredibly satisfying about crafting your own bread. With just a few simple ingredients—flour, water, yeast, and a few seasonings—you can achieve a delightful homemade product that will impress your friends and family. Popularized by street vendors in Turkey, bazlama is traditionally cooked on a flat surface, making it perfect for cooking on the stovetop. You’ll also save money and time by making your own compared to buying from the store.
Here are a few more reasons to whip up a batch of this easy no-oven Turkish bread yourself:
- Freshness: Homemade bread has an irreplaceable quality. The smell alone will have your neighbors asking what’s cooking!
- Nutrition: When you make bread at home, you control the ingredients, allowing you to avoid preservatives and allergens often found in store-bought varieties.
- Versatility: Use it for wraps, dips, or simply slathered with your favorite spread! How about pairing it with Turkey Bacon and avocado?
Additionally, the cooking process itself can be a relaxing and enjoyable experience. It’s a wonderful way to unwind after a hectic week!
If you’re new to making bread, you might think the process is complex, but let me assure you—bazlama is quick and straightforward. Plus, with numerous online resources and tutorials available, a few clicks can guide you through any hiccups.
So, are you ready to roll up those sleeves and dive into the world of homemade bazlama? You’ll be amazed at the results—and you’ll impress yourself along the way!
Ingredients for Easy No-Oven Turkish Bread
Essential ingredients for the dough
Crafting easy no-oven Turkish bread starts with a few basic, yet essential ingredients that come together to create a soft, pillowy loaf. Here’s what you’ll need:
- All-purpose flour: The backbone of our bread; about 3 cups will do.
- Warm water: Approximately 1 cup, to help activate the yeast.
- Active dry yeast: A couple of teaspoons will give it that lovely rise.
- Sugar: Just a teaspoon to nourish the yeast.
- Salt: Around a teaspoon for flavor.
- Olive oil: About 2 tablespoons, adding richness and moisture.
For a deeper dive into bread-making fundamentals, check out this informative article on How Yeast Works by The Kitchn.
Optional toppings to elevate your bread
Want to make your easy no-oven Turkish bread truly standout? Consider these tasty optional toppings:
- Sesame seeds: A sprinkle will add crunch and nuttiness.
- Za’atar spice blend: A dash of this Middle Eastern mix can elevate the flavor profile.
- Fresh herbs: Chopped parsley or dill for a bright finish.
- Cheese: Crumbled feta or shredded mozzarella can provide a savory twist.
With these ingredients, you’re well on your way to making a delightful bread that needs no oven! What flavors resonate with your palate?
Preparing Easy No-Oven Turkish Bread
If you’ve ever craved the warm, comforting taste of freshly baked bread but rendered your oven too hot to handle, you’re in for a treat! Making easy no-oven Turkish bread is not only simple but also a delightful way to savor homemade goodness without the fuss of an oven. This quick recipe will have you impressing friends and family in no time. Let’s dive into each essential step of this delicious process!
Preparing the yeast mixture
To start your adventure in creating easy no-oven Turkish bread, you first need to prepare a flavorful yeast mixture. Here’s what you’ll need:
- 1 cup warm water (about 110°F or 43°C)
- 1 packet active dry yeast (about 2 ¼ teaspoons)
- 1 tablespoon sugar
In a mixing bowl, combine the warm water and sugar; stir gently until the sugar dissolves. Add in the yeast and let it sit for about 10 minutes until foamy. This step is crucial because it activates the yeast, ensuring your bread rises beautifully. If you want to learn more about the science behind yeast activation, check out this informative article.
Mixing and kneading the dough
Once your yeast is ready, it’s time to mix and knead the dough. In a large bowl, combine:
- 3 cups all-purpose flour
- 1 teaspoon salt
- 2 tablespoons olive oil
Create a well in the center of the dry ingredients and pour in the yeast mixture. Mix with a wooden spoon until a rough dough forms. Turn the dough out onto a floured surface and knead it for about 8-10 minutes, until it’s smooth and elastic. This is not only a workout but also a fun way to relieve stress after a long day! Kneading helps to develop gluten, which gives the bread its lovely structure.
Proofing the dough for perfect texture
Next up is the proofing stage, which allows the dough to rise and develop flavor. Place your kneaded dough in a lightly greased bowl, cover it with a clean kitchen towel or plastic wrap, and let it rest in a warm place for about 1 hour. If you want to speed up the process, you can place the bowl in a turned-off oven with just the light on; it creates a cozy environment for your dough to thrive.
After an hour, your dough should have doubled in size! This is the moment where the magic happens, allowing the flavors to deepen and the texture to become perfect. Did you know that allowing dough to ferment longer develops more complex flavors? It’s true!
Shaping the rounds
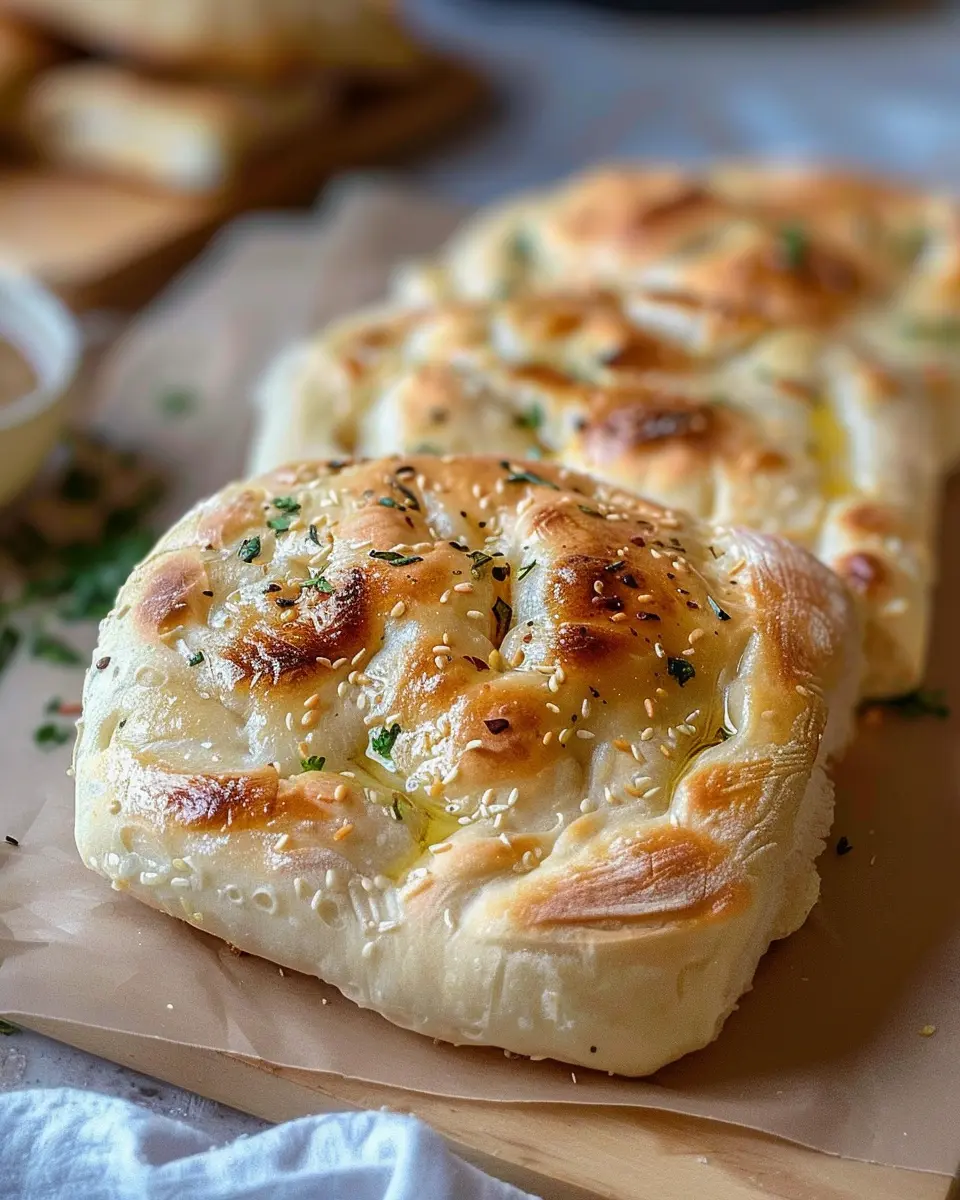
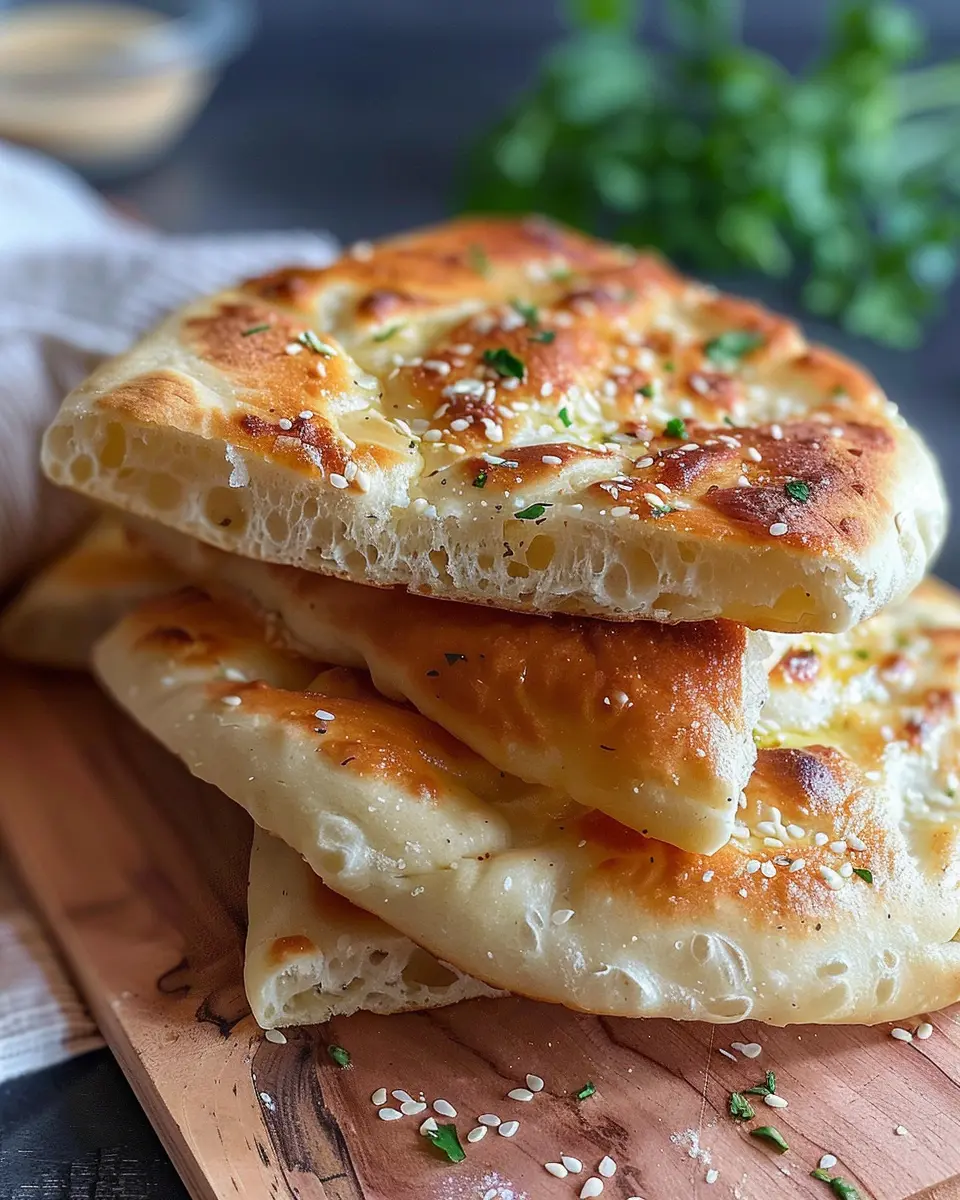
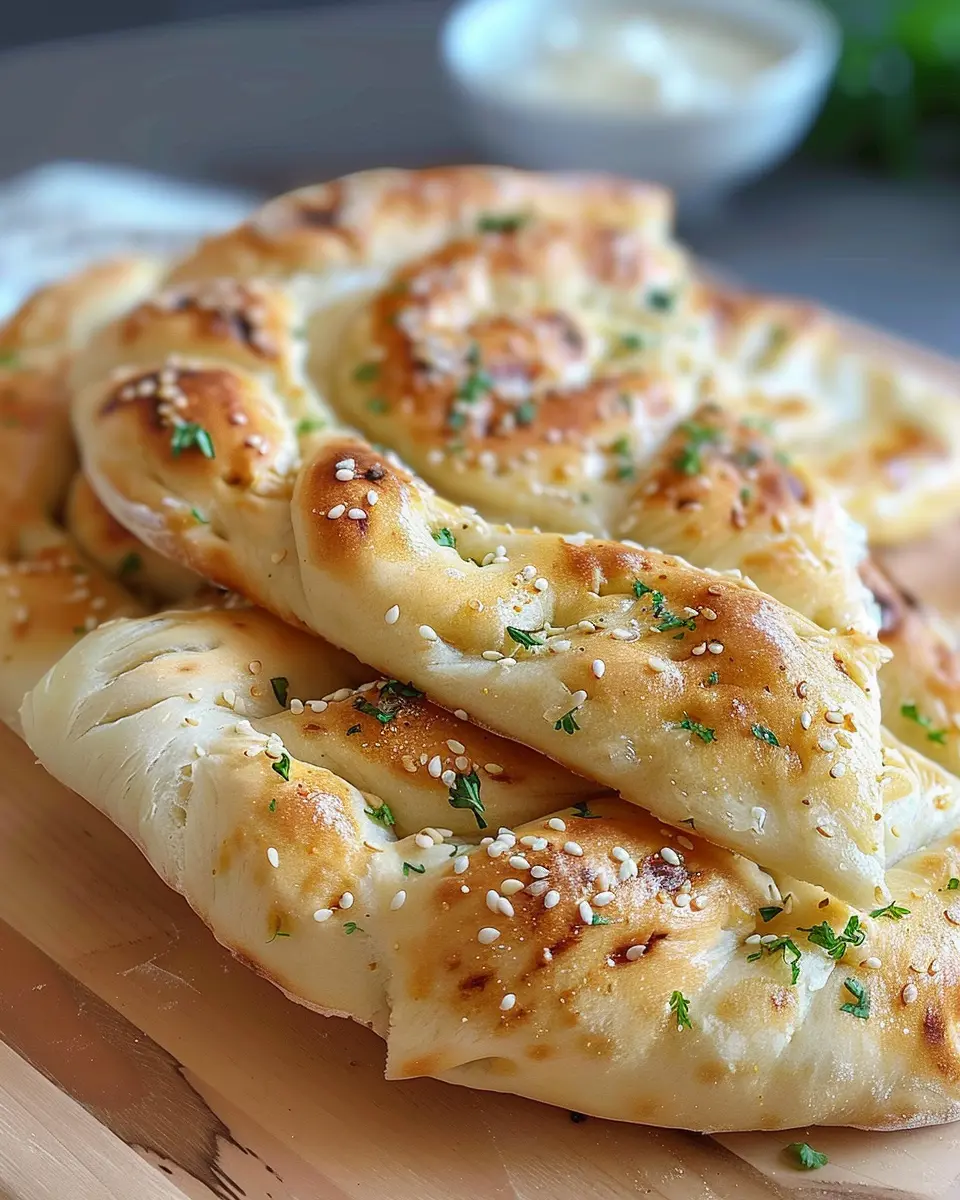
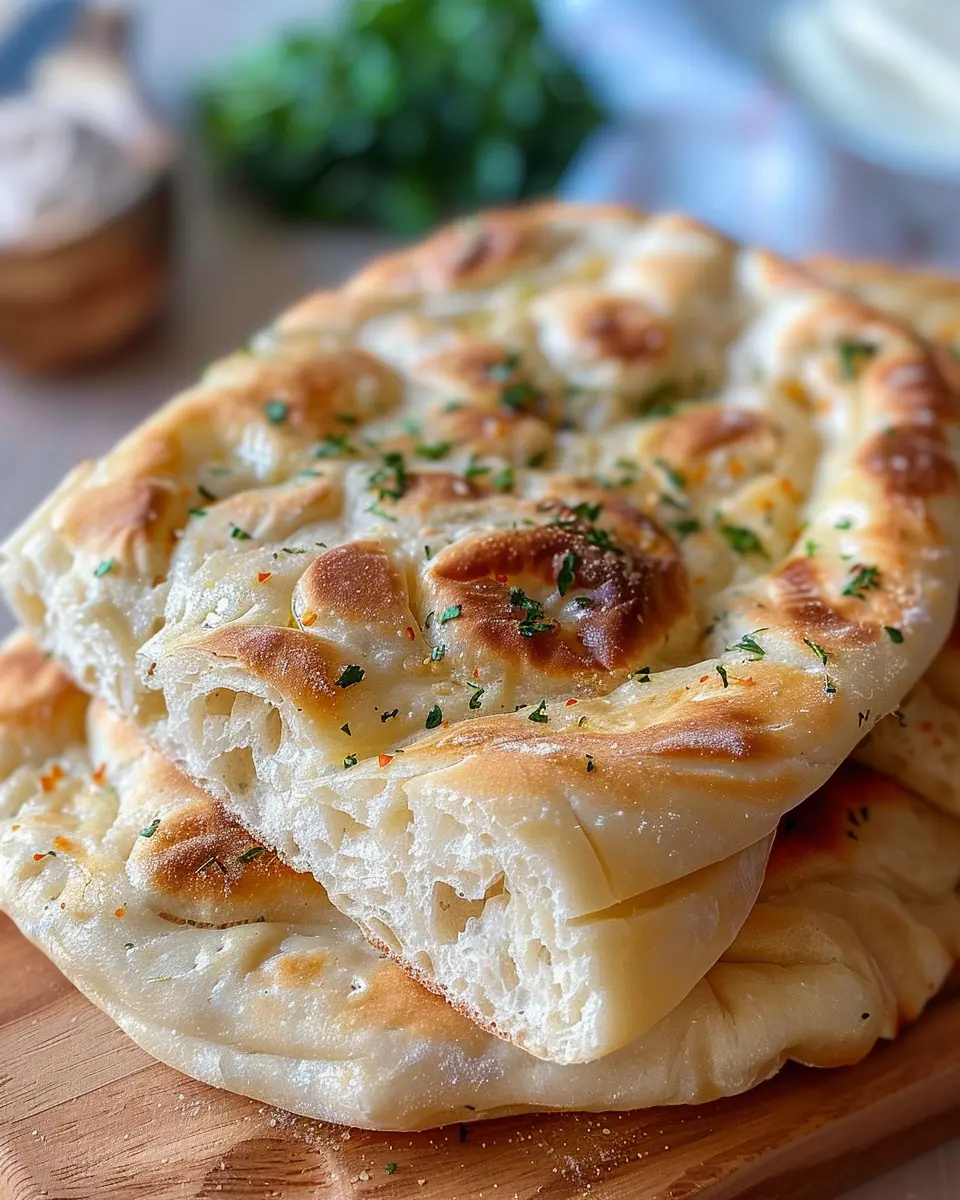
Now that your dough has risen wonderfully, it’s time to shape it into rounds for cooking. Lightly flour your work surface again and gently punch down the dough to release any excess air. Divide the dough into equal pieces, about the size of your fist. Roll each piece into a smooth ball, then flatten to about ½ inch thick. At this stage, you can also sprinkle some sesame seeds or nigella seeds on top for added flavor and texture, though this step is purely optional.
Cooking the bread on the stovetop
Finally, we’ve arrived at the fun part—cooking your easy no-oven Turkish bread! Heat a non-stick skillet or griddle over medium heat. Once hot, place a round of dough in the skillet and cook for about 2-3 minutes on each side, or until golden brown. You might want to slightly press down with a spatula to ensure an even cooking surface.
Once cooked, transfer the bread to a cooling rack and repeat with the remaining dough. The aroma filling your kitchen will be enough to have everyone gathering around for a taste! You can enjoy this bread plain or with toppings like Turkey Bacon or Chicken Ham—the possibilities are endless.
Now, you’ve successfully made homemade easy no-oven Turkish bread, ready to be enjoyed. Serve it warm, and watch as it disappears in moments! Celebrate this culinary achievement and share with someone special. Happy cooking!
Variations on Easy No-Oven Turkish Bread
Spiced Versions of Turkish Bread
If you’re looking to take your easy no-oven Turkish bread to the next level, consider adding some spices! A pinch of cumin or coriander can awaken the flavor and give your bread a warm, aromatic essence. For a bit of heat, toss in some red pepper flakes or smoked paprika. Not only do these spices enhance the taste, but they also add an exotic flair that impresses guests.
You can also experiment with herbs. Fresh dill, parsley, or mint can bring a refreshing twist, while dried oregano or basil adds a touch of Italian flair. Just remember to balance the spices so they complement rather than overpower the bread’s natural flavors.
Stuffed Turkish Bread Ideas
Now, if you’re feeling adventurous, why not stuff your easy no-oven Turkish bread? Here are a few delicious ideas:
- Cheese and Spinach: A classic combo that never disappoints. Use feta or mozzarella for a delightful melt.
- Turkey Bacon and Egg: Perfect for breakfast! Crispy turkey bacon with eggs folded in adds both protein and flavor.
- Mediterranean Veggies: Stuff your bread with sautéed bell peppers, zucchini, and olives for a colorful and healthy option.
- Chicken Ham and Cheese: Layer in slices of chicken ham and your favorite cheese for a savory twist.
These variations can make your Turkish bread even more versatile. They’re perfect for a snack, lunch, or even a fun dinner at home with friends! For more inspiration, check out resources from BBC Good Food or Serious Eats.
So, which variation will you try first?
Cooking Tips and Notes for Easy No-Oven Turkish Bread
Common Mistakes to Avoid
When making easy no-oven Turkish bread, it’s easy to run into a few snags. Here are some common pitfalls:
- Overmixing the Dough: This can lead to dense bread. Mix until just combined for a light texture.
- Wrong Pan Choice: Using a pan that’s too small might cause the bread to cook unevenly. Opt for a large skillet or griddle that provides plenty of space.
- Not Heating the Pan Properly: If your pan isn’t hot enough, the bread will cook slowly, resulting in a tough exterior. Make sure to preheat it well!
Equipment Recommendations for Best Results
For a successful batch of easy no-oven Turkish bread, consider investing in a few key tools:
- Non-stick Skillet or Cast Iron Pan: A good quality non-stick surface ensures the bread doesn’t stick, while cast iron retains heat well.
- Rolling Pin: To achieve an even thickness, a rolling pin is ideal. A wine bottle can work in a pinch!
- Kitchen Towel: Cover your bread with a towel after cooking to keep it warm and soft.
Using these tools will elevate your bread-making game! For more tips, check out Serious Eats for excellent cooking insights.
Serving Suggestions for Easy No-Oven Turkish Bread
Perfect pairings for your bread
When it comes to easy no-oven Turkish bread, the possibilities are endless! This versatile bread pairs wonderfully with various dips and spreads. Consider serving it with:
- Hummus – A classic dip that complements the bread’s airy texture.
- Tzatziki – Cool and refreshing; this yogurt-based sauce brings a delightful contrast.
- Olive oil and balsamic vinegar – Just a drizzle for a simple yet elegant treat.
If you’re feeling a bit heartier, try topping it with Turkey Bacon or Chicken Ham for a satisfying brunch option. Don’t forget to add some fresh veggies or greens for that extra crunch.
Creative serving ideas for gatherings
Hosting friends or family? Your easy no-oven Turkish bread can shine at any gathering! Here are some fun ideas:
- Bread Bowls: Hollow out a loaf and fill it with a warm soup for a unique serving twist.
- Mini Sandwiches: Slice the bread into smaller portions and fill them with customizable options, like Turkey Bacon or roasted vegetables.
- Platter Atmospheres: Arrange your bread alongside a charcuterie board brimming with cheeses, fruits, and Chicken Ham. Your guests will appreciate the variety.
Experimenting with these serving ideas not only makes your meals memorable but also sparks conversation. For more tips on serving bread, check out resources on Food Network or BBC Good Food.
Time Breakdown for Easy No-Oven Turkish Bread
Understanding how to manage your time in the kitchen can make the baking process so much smoother. Here’s a quick breakdown for making your easy no-oven Turkish bread:
Preparation time
You’ll need about 10-15 minutes to whip up your ingredients and get everything ready. This includes mixing your dough and getting your skillet preheated.
Cooking time
Cooking the bread takes roughly 10-15 minutes per batch. It’s perfect for that moment when you’re craving something fresh and warm but don’t want to spend hours.
Total time
All in all, you’re looking at a total of about 30-40 minutes from start to finish. That’s not too shabby for a delicious homemade bread option, right? If you’d like to dive deeper into bread-making tips, check out this guide on bread basics.
Nutritional Facts for Easy No-Oven Turkish Bread
When it comes to satisfying your cravings, this easy no-oven Turkish bread stands out not only for its flavor but also for its nutritional profile.
Calories per serving
Each serving of this delightful bread comes in at approximately 150 calories. This makes it a fantastic option for a delicious snack or a base for various toppings without overindulging.
Macronutrient breakdown
- Carbohydrates: About 28g
- Protein: Around 4g
- Fats: Roughly 3g
With a balanced macronutrient profile, easy no-oven Turkish bread is versatile enough to be paired with toppings like turkey bacon or chicken ham for a hearty breakfast or lunch. Plus, you can always opt for fresh veggies to enhance its nutritional value! For more in-depth nutrition tips, check out nutrition.gov.
Curious about how this bread fits into a balanced diet? Remember that moderation is key, and enjoy it as part of a varied meal plan!
FAQs about Easy No-Oven Turkish Bread
Can I use whole wheat flour for this recipe?
Absolutely! Using whole wheat flour in your easy no-oven Turkish bread will add a lovely nutty flavor and an extra dose of nutrients. Just keep in mind that the texture might be denser than when using all-purpose flour. If you prefer a lighter bread, you might experiment by blending whole wheat with all-purpose flour—70% whole wheat and 30% all-purpose could be a great start!
How do I store leftover Turkish bread?
Storing your easy no-oven Turkish bread doesn’t have to be complicated. Here are a few tips to keep it fresh:
- Wrap it Up: Wrap the bread in a clean kitchen towel or parchment paper to maintain its softness.
- Seal It: Place it in an airtight container or a zip-top bag for longer shelf life.
- Freezing: If you have more than you can eat in a few days, freeze the bread! Just slice it first for easier thawing later. It’ll last up to three months in the freezer.
What are some dips that go well with this bread?
Dipping is one of the best parts of enjoying your easy no-oven Turkish bread! Here are a few suggestions to elevate your snacking experience:
- Hummus: A classic choice, packed with flavor.
- Tzatziki: Cool, creamy, and refreshing—perfect for summer.
- Muhammara: This spicy red pepper dip can really bring the heat and excitement to your plate!
For more culinary inspiration, check out The Spruce Eats for delicious dip recipes to try alongside your Turkish bread. Enjoy exploring these combinations and share your favorites!
Conclusion on Easy No-Oven Turkish Bread
Your homemade journey starts here!
As you conclude your adventure in creating easy no-oven Turkish bread, remember that this recipe is just the tip of the iceberg! Whether you’re enjoying it with a hearty soup or filling it with delectable ingredients like Turkey Bacon or Chicken Ham, the possibilities are truly endless. The simplicity of this recipe means you can whip it up anytime, even on a busy weeknight.
Why not experiment with herbs or spices to make it uniquely yours? Involving friends or family can turn this into a fun group activity, and sharing your creations can spark delightful conversations.
So, roll up your sleeves and start this flavorful journey today! For more inspirations, check out The Spruce Eats for complementary dish ideas. Happy baking!
PrintEasy No-Oven Turkish Bread: The Best Homemade Recipe You’ll Love

Learn how to make delicious Turkish bread without using an oven. This easy recipe is perfect for anyone looking to create a fresh, homemade loaf with minimal effort.
- Prep Time: 10 minutes
- Cook Time: 30 minutes
- Total Time: 40 minutes
- Yield: 1 loaf 1x
- Category: Bread
- Method: Stovetop
- Cuisine: Turkish
- Diet: Vegetarian
Ingredients
- 2 cups all-purpose flour
- 1 teaspoon salt
- 1 tablespoon sugar
- 1 tablespoon instant yeast
- 3/4 cup warm water
- 2 tablespoons olive oil
Instructions
- In a bowl, mix together the flour, salt, sugar, and instant yeast.
- Add warm water and olive oil, then knead until a smooth dough forms.
- Let the dough rise in a warm place for 30 minutes.
- Flatten the dough and shape it into a round loaf.
- Cook the bread in a skillet over medium heat for 10-15 minutes on each side, until golden brown.
Notes
- For extra flavor, add herbs or spices to the dough.
- Brush the bread with olive oil before cooking for a crispier crust.
Nutrition
- Serving Size: 1 slice
- Calories: 150
- Sugar: 1g
- Sodium: 300mg
- Fat: 4g
- Saturated Fat: 0.5g
- Unsaturated Fat: 3g
- Trans Fat: 0g
- Carbohydrates: 26g
- Fiber: 1g
- Protein: 4g
- Cholesterol: 0mg
Keywords: Easy No-Oven Turkish Bread, homemade bread, quick bread recipe