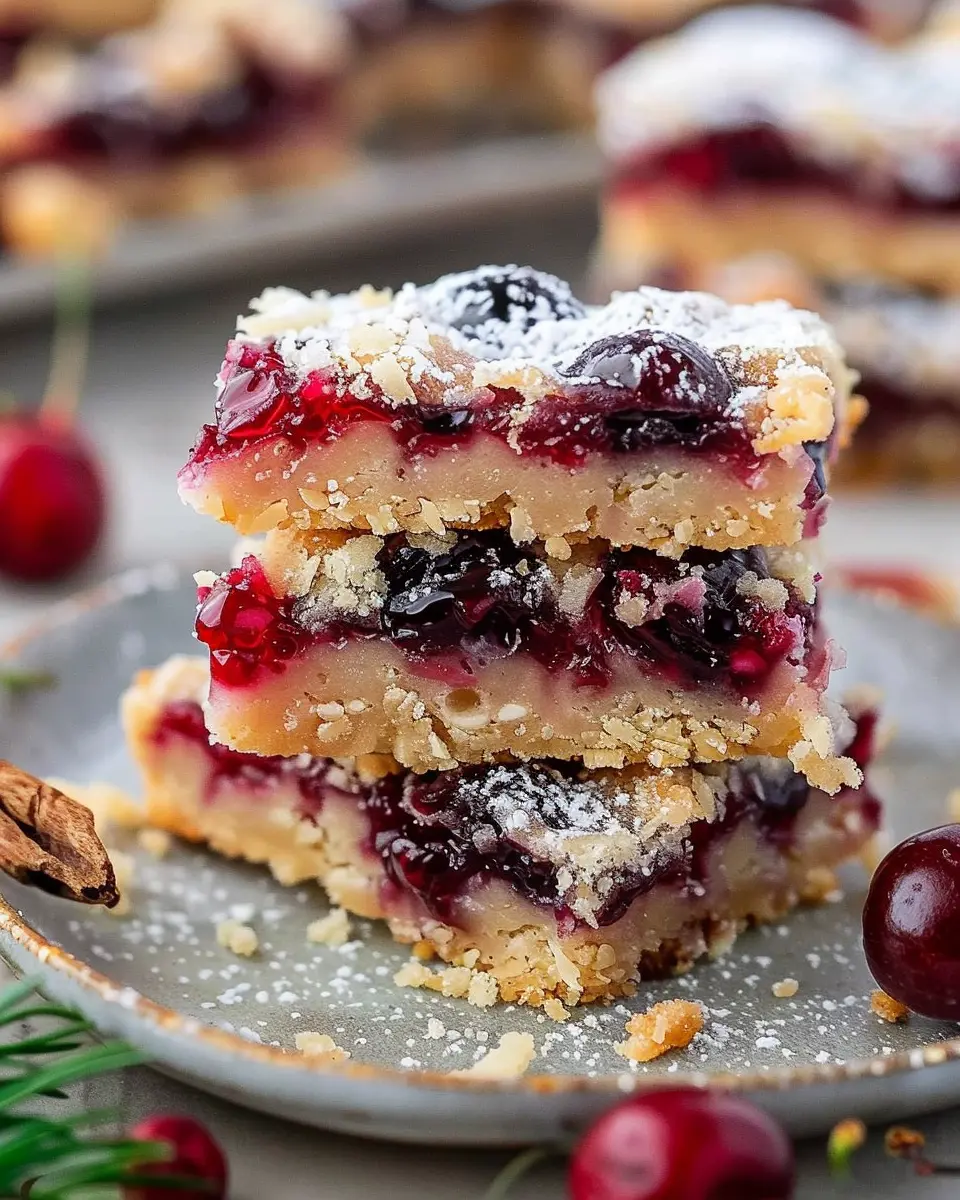
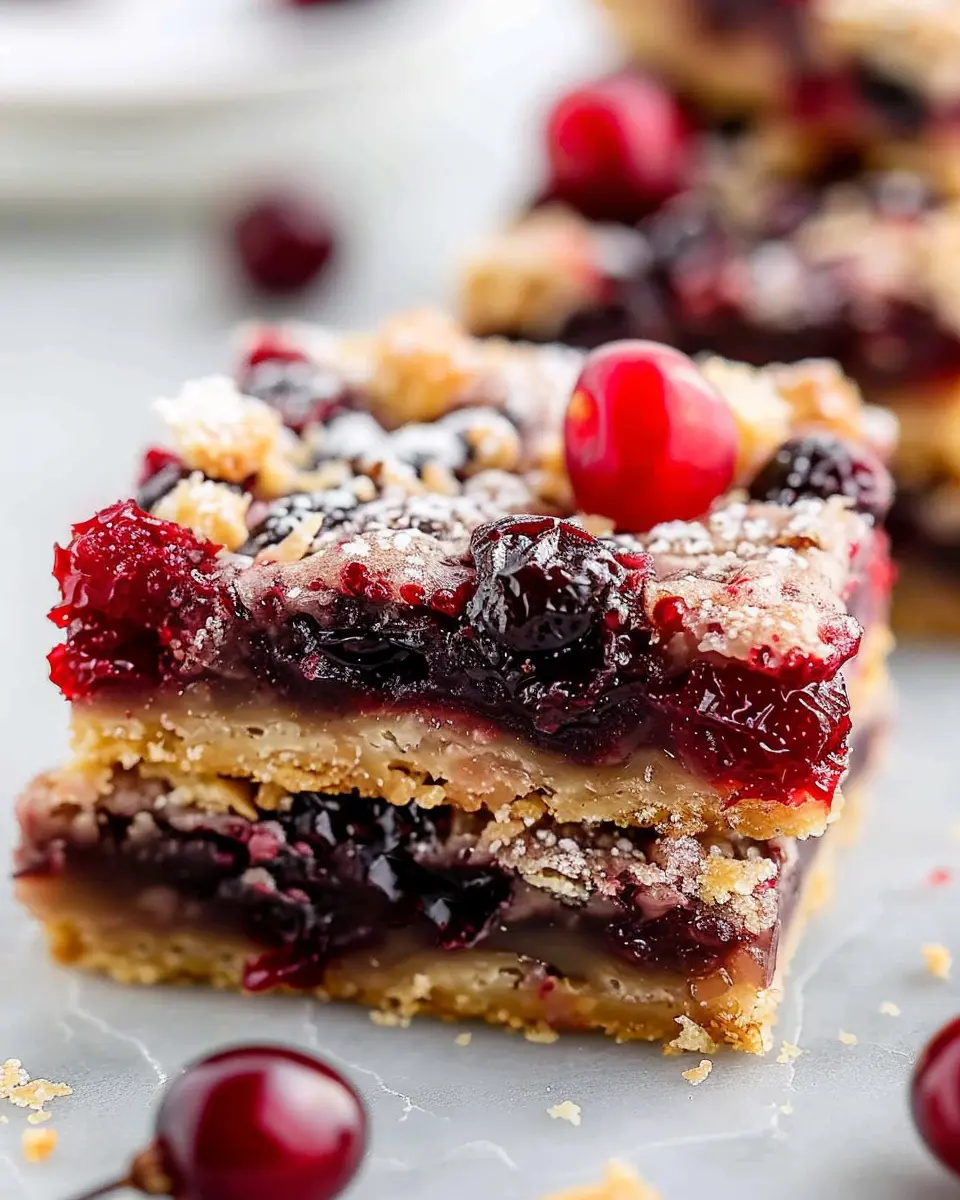
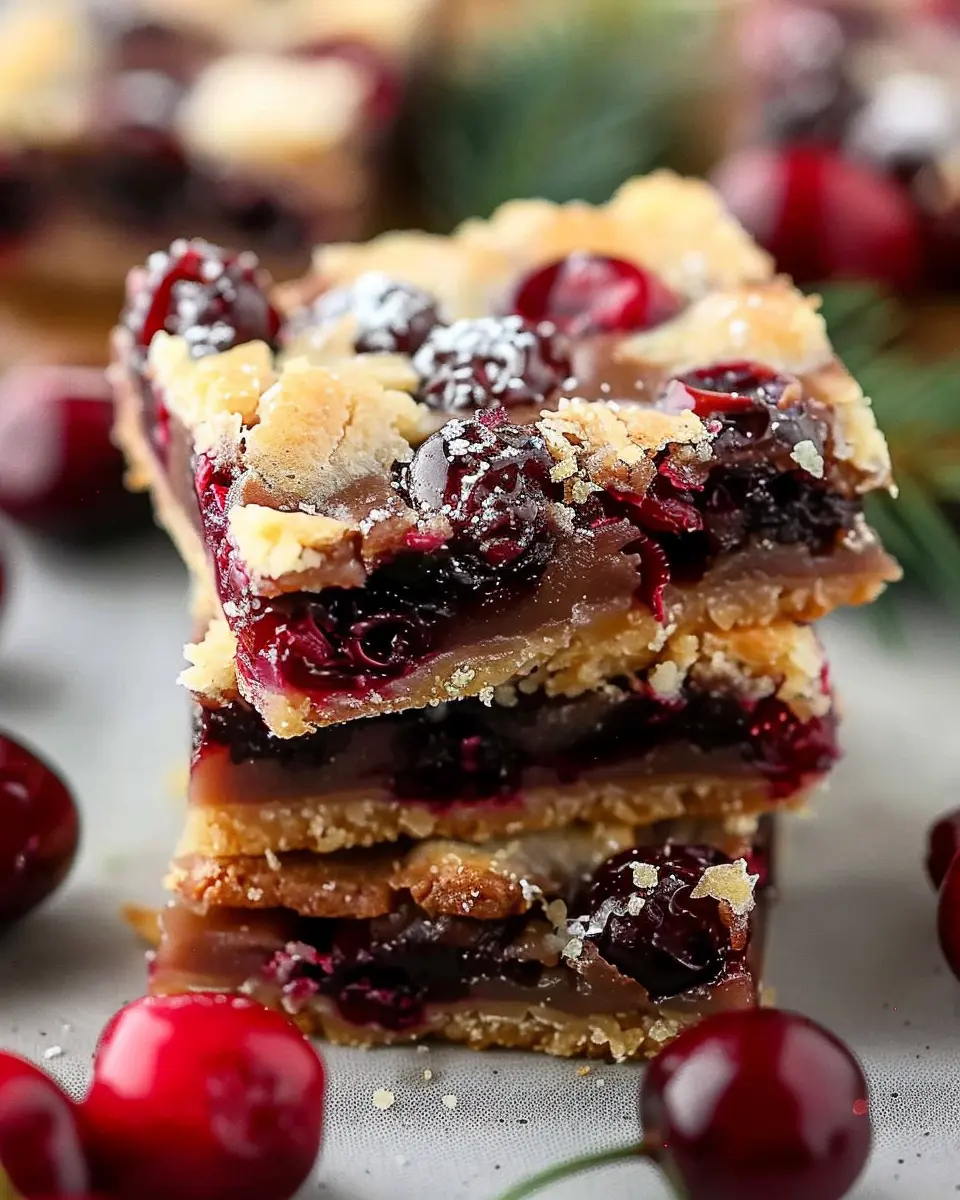
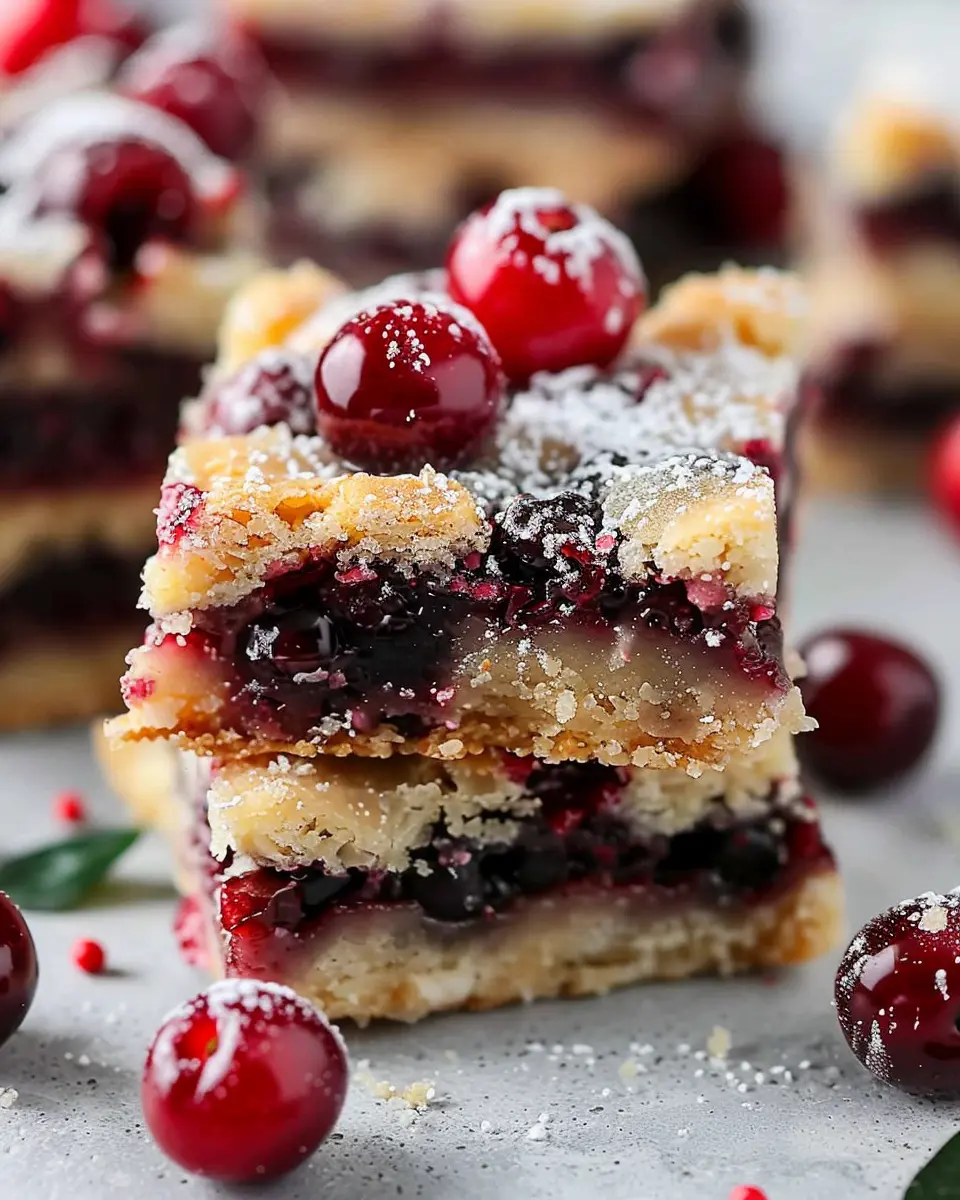
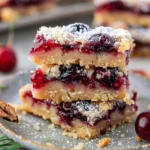
Introduction to Christmas Cherry Bars
When the holiday season rolls around, we all crave those delicious treats that fill our homes with cheer and sweet aromas. Enter the delightful Christmas Cherry Bars—a scrumptious dessert that perfectly encapsulates the festive spirit! With their vibrant red hue and luscious cherry filling, these bars are not just a feast for the taste buds but also a visual delight.
Why Christmas Cherry Bars are the Perfect Holiday Treat?
Imagine gathering with family and friends around a table adorned with holiday goodies. What better way to add a pop of color and sweetness than with a tray of Christmas Cherry Bars? These bars blend a buttery crust with a rich layer of cherry filling, making them an instant hit at any holiday gathering.
-
Easy to Make: If you’re juggling a busy holiday schedule, these bars are a lifesaver. With straightforward steps and minimal ingredients, you can whip them up in no time. Just a few simple additions and you’re on your way to holiday bliss!
-
Versatile Flavor Profile: Beyond the classic cherry, these bars can be easily adapted. Feeling adventurous? Experiment with flavors like almond or lemon to keep your guests guessing!
-
Perfect for Gift Giving: Looking for thoughtful gift ideas? Slice these bars into bite-sized pieces and package them in festive boxes for friends, family, or coworkers. Everyone loves a homemade treat, and these bars make a charming, heartfelt gift.
-
A Surprising Twist on Tradition: While we often gravitate towards cookies and cakes during the holidays, Christmas Cherry Bars bring something unique to the dessert table. Their chewy texture and fruity filling promise to delight even the pickiest eaters.
As you prepare for the festivities, don’t forget to stock up on cherries! Opt for fresh or quality canned cherries to ensure your bars are bursting with flavor. For tips on how to pick the best ingredients for your baking, check out resources from the U.S. Agricultural Department or delve into baking blogs that offer expert advice.
In conclusion, the charm of Christmas Cherry Bars lies in their simplicity and delightful flavor. They are not just a sweet treat; they embody the warmth and love of the holiday season. So, gather your friends and family, roll up your sleeves, and get ready to create some holiday magic in your kitchen!
Ingredients for Christmas Cherry Bars
Essential ingredients for a delicious bar
When it comes to making festive Christmas Cherry Bars, the right ingredients can elevate your bake from simple to sublime. Let’s gather the essentials that’ll bring your bars to life!
- Fresh or maraschino cherries: Depending on your preference, use fresh cherries for a tart punch or maraschino cherries for a sweeter flavor. Both options make for a beautiful and tasty addition.
- Butter: Unsalted butter adds richness and helps create that perfect chewy texture. Don’t skimp on quality here!
- Granulated sugar: This will sweeten your bars and help them form that delicious crust.
- Brown sugar: Adds a subtle depth of flavor and moisture that complements the cherries beautifully.
- Flour: All-purpose flour is your go-to base, giving structure to these delightful treats.
- Eggs: They help bind everything together and contribute to the bars’ lovely texture.
- Almond extract: A splash of this enhances the cherry flavor, creating a festive aroma that’s almost irresistible.
These ingredients are generally easy to find at your local grocery store. For special varieties of cherries or even organic options, consider checking out local farmers’ markets. Happy baking!
Preparing Christmas Cherry Bars
Getting ready for the holidays is always a joyful task, especially when it involves baking delicious treats. If you’re looking to impress your friends and family with something colorful and festive, Christmas Cherry Bars might just be the perfect pick. Here’s a helpful step-by-step guide to ensure your baking experience goes smoothly.
Gather Your Ingredients
The first step in preparing these lovely cherry bars is to gather all your ingredients. Here’s what you’ll need:
-
For the base and topping:
-
1 cup unsalted butter, softened
-
1 cup granulated sugar
-
2 large eggs
-
1 teaspoon vanilla extract
-
2 cups all-purpose flour
-
1 teaspoon baking powder
-
A pinch of salt
-
For the cherry filling:
-
1 can (21 oz) cherry pie filling
-
1 tablespoon lemon juice
-
Optional: 1 teaspoon almond extract for an extra flavor kick!
Gathering everything ahead of time not only makes the process more enjoyable but also minimizes the chances of running to the store mid-bake!
Preheat the Oven and Prepare the Pan
Next, you’ll want to preheat your oven to 350°F (175°C). This step is crucial for ensuring your Christmas Cherry Bars bake evenly and have that delightful golden-brown finish.
While the oven is heating up, prepare a 9×13-inch baking pan by greasing it lightly or lining it with parchment paper. This ensures easy removal of the bars once they’ve cooled. Don’t overlook this step; nothing is worse than a delicious dessert that’s stuck to the pan!
Making the Batter
Now, it’s time to get mixing. In a large bowl, beat together the softened butter and granulated sugar until the mixture is light and fluffy. You want to incorporate as much air as possible — this helps create that lovely texture in your bars.
Next, add in the eggs one at a time, mixing well after each addition, and then stir in the vanilla extract. In a separate bowl, whisk together the flour, baking powder, and salt. Gradually combine the dry ingredients with the wet mixture until you form a smooth batter. It should be thick yet spreadable — don’t worry, you can always add a splash of milk if it’s too stiff!
Spreading the Cherry Filling
Once your batter is ready, gently spread half of it evenly into the bottom of your prepared pan. This will serve as the base layer for your Christmas Cherry Bars. Make sure it’s nice and smooth for an even bake.
Next, pour the cherry pie filling over the batter, spreading it out evenly. If you’re feeling adventurous, add a splash of lemon juice and almond extract to the filling for a little extra zest! Finally, take the remaining batter and dollop it over the cherry filling. It doesn’t need to be perfect; those lovely cherry swirls will show through.
Baking the Bars to Perfection
With everything layered, pop your pan into the preheated oven and bake for about 30 to 35 minutes, or until the edges are golden and a toothpick inserted into the center comes out clean. Your kitchen will soon smell wonderfully festive!
Preparing the Optional Glaze
While your bars are baking, you might consider creating a simple glaze to drizzle on top. Combine 1 cup of powdered sugar with 2 tablespoons of milk and a teaspoon of vanilla extract. Whisk until smooth and adjust the consistency to your liking. A little drizzle can really elevate your Christmas Cherry Bars!
Cooling and Slicing the Bars
Once baked, take your bars out of the oven and let them cool in the pan for about 10 minutes. Then, transfer them to a wire rack to cool completely. This is key; slicing them while warm can cause a mess! Once cooled, cut them into squares and, if you’ve made the glaze, drizzle it on top.
Enjoy sharing your delightful Christmas Cherry Bars with loved ones — they’re sure to be a hit! For more festive recipes, check out blogs like AllRecipes or Taste of Home for extra holiday inspiration. Happy baking!
Variations on Christmas Cherry Bars
When it comes to Christmas Cherry Bars, there’s so much room for delicious creativity! Whether you’re hosting a holiday party or looking to surprise family with a festive treat, these variations will elevate your dessert game.
Adding Almond Extract for Enhanced Flavor
One simple way to enhance the flavor profile of your Christmas Cherry Bars is by incorporating almond extract. Just a teaspoon can add a delightful nuttiness that complements the cherry filling beautifully. This is particularly appealing if you enjoy the unique flavor of marzipan, as almond and cherry are a classic combination seen in countless desserts. If you’re feeling adventurous, consider mixing it into the crust or the filling—experiment to see where it fits best into your recipe!
Exploring Different Fruit Fillings
While the star of our recipe is cherry, don’t hesitate to explore other fruit fillings for your Christmas Cherry Bars.
- Blueberry: Fresh or frozen blueberries can offer a juicy, burst of flavor.
- Raspberry: Tart raspberries can bring a refreshing twist to this traditional bar.
- Peach or Apricot: These sweeter fruits can create a delightful contrast to the buttery base.
Each fruit provides its unique character, so think about your favorite flavors or seasonal fruits when crafting your bars.
Remember, the joy of baking comes as much from the process as from tasting the end result. So, why not experiment with these variations during your next holiday bake-off? For further inspiration, consider checking out this guide on fruit dessert pairings to learn more about compatible flavors. Happy baking!
Baking notes for Christmas Cherry Bars
Tips for ensuring the perfect texture
Getting the texture just right in your Christmas Cherry Bars can elevate your baking game. To achieve that delightful combination of chewy and crumbly, consider the following tips:
- Room Temperature Ingredients: Ensure your butter and eggs are at room temperature before mixing. This helps create a smoother batter, resulting in a tender bar.
- Don’t Overmix: When combining your dry and wet ingredients, mix just until combined. Overmixing can lead to tough bars, which we definitely want to avoid.
How to prevent sticking
No one enjoys the disappointment of pulling out a beautiful batch of Christmas Cherry Bars only to have them stick to the pan. Here’s how to keep them intact:
- Greasing the Pan: Generously grease your baking pan with butter or a non-stick spray. A parchment paper lining also does wonders—simply cut it to size and place it at the bottom for an easy lift.
- Cooling Time: Allow the bars to cool completely in the pan before cutting. This step not only makes them easier to slice but also helps them hold their shape beautifully.
By following these simple yet effective strategies, you’ll have a festive treat that’s sure to impress friends and family this holiday season! If you’d like to dive deeper into baking tips, check out The Spruce Eats for more expert advice.
Serving suggestions for Christmas Cherry Bars
Pairing with holiday beverages
The vibrant flavors of Christmas Cherry Bars make them perfect for pairing with a variety of festive beverages. Consider serving them alongside a steaming cup of peppermint hot chocolate or a spiced apple cider. The rich chocolate and tart cherries create a delightful contrast with the warmth of these drinks. If you’re hosting a gathering, you might also want to whip up some gingerbread lattes to highlight those lovely holiday spices.
Presenting as festive gifts
Imagine wrapping up Christmas Cherry Bars in cheerful packaging—perfect for gift-giving! Consider placing them in a decorative tin or a cute holiday box tied with a festive ribbon. Personalize it by attaching a handwritten note to your friends or coworkers to share the holiday spirit and your delicious creation. You could even include a little recipe card, allowing them to recreate the magic in their kitchen later on. Sharing these delightful treats not only spreads joy but also helps foster community during the holiday season.
For great packaging ideas, check out sites like Martha Stewart or Good Housekeeping for inspiration.
Tips for making perfect Christmas Cherry Bars
Ensuring even baking
To achieve beautifully baked Christmas Cherry Bars, start by evenly spreading your batter in the pan. A spatula works wonders! Consider using an oven thermometer; ovens can vary in temperature, and a slight difference can impact your baking. Rotate your pan halfway through the baking time for an even result—this is key in ensuring that every bar is flawlessly baked. If you notice your edges browning faster, don’t hesitate to cover them with foil for the remainder of the bake. Your patience will be rewarded with lush, clean cuts when the time comes to serve!
Storing leftovers for freshness
Let’s face it, these Christmas Cherry Bars are so delicious that leftovers may be a rarity, but just in case you have some to store, follow these tips to keep them fresh. Once cooled completely, cut your bars and place them in an airtight container with parchment paper to separate layers. This prevents sticking and preserves texture. A quick tip: if you want to extend their life, consider freezing them! Wrap bars in plastic wrap first, then place them in a freezer-safe bag. Thaw in the fridge overnight for a delightful treat any time. For more on baking tips, check out this expert guide on baking basics.
By following these simple tips, you’ll create Christmas Cherry Bars that not only look stunning but also taste heavenly!
Time details for Christmas Cherry Bars
Preparation time
Creating these delightful Christmas Cherry Bars calls for about 15-20 minutes of prep. This includes gathering your ingredients, mixing the batter, and spreading it into your baking dish. Make sure to set aside enough time to enjoy the process and maybe even sip on some coffee!
Cooking time
Once you have your batter ready and in the oven, the cooking time is roughly 30-35 minutes. You’ll know they’re done when the edges are golden brown and a toothpick comes out clean from the center.
Total time
All in all, you’re looking at a total time of about 50 minutes to an hour from start to finish. Perfect for a quick holiday treat to impress your friends and family! You’ll find that these bars not only taste amazing but also fill your kitchen with that wonderful festive aroma.
For more details on baking techniques, feel free to check out King Arthur Baking for helpful tips and tricks.
Nutritional information for Christmas Cherry Bars
When you’re getting ready to whip up these delightful Christmas Cherry Bars, it’s helpful to know what you’re indulging in. Here’s a quick breakdown:
Calories
Each bar contains approximately 150 calories. Not too shabby, right? These bars can be a sweet treat without sending your calorie counts skyrocketing.
Sugar Content
With about 10 grams of sugar per bar, these Christmas Cherry Bars strike a balance between sweetness and healthiness. For a festive dessert, that’s quite reasonable!
Serving Size Details
Typically, this recipe yields around 12 bars. So, if you’re flinging a holiday gathering, you can easily adjust your batch size according to the number of guests. Sharing might be caring, but who says you can’t enjoy an extra bar or two?
Want to learn more about the health benefits of cherries? Check out Healthline for some great insights!
FAQs about Christmas Cherry Bars
Can I make these bars ahead of time?
Absolutely! One of the best things about Christmas Cherry Bars is that you can prepare them in advance. You can bake the bars up to a week ahead and store them at room temperature. Just make sure they’re in an airtight container to keep them fresh. If you need to make them even further in advance, you can freeze them for up to three months. Just let them cool completely, wrap them tightly in plastic wrap, and then in foil before placing them in the freezer. When it’s time to enjoy, let them thaw in the fridge overnight before serving.
What are the best substitutes for the cherry filling?
If cherries aren’t your jam or you’re looking for alternatives, you have plenty of delicious options! Consider using:
- Raspberry filling for a tangy twist.
- Blueberry jam for a burst of sweetness.
- Strawberry preserves for a classic taste.
You could even mix and match different fillings for a unique flavor profile. For a great overview of fruit fillings, check out this resource on using seasonal fruits for your baking.
How do I store Christmas Cherry Bars?
Storing your Christmas Cherry Bars correctly will keep them tasting fresh. As mentioned, an airtight container is key! It helps maintain moisture and prevents them from drying out. If you have any leftovers, place them in the fridge—just be sure to let them come to room temperature before serving, as the flavors will shine through better! For long-term storage, freezing is a fantastic option—just follow the steps outlined above.
If you have any other questions, feel free to reach out or explore more recipes for holiday treats! Happy baking!
Conclusion on Christmas Cherry Bars
Making and sharing Christmas Cherry Bars is more than just a baking task; it’s an opportunity to create delightful memories with loved ones. The bright, tart cherries contrasted against the sweet, buttery base make for a treat that’s hard to resist. Whether you’re hosting a holiday gathering or just treating yourself, these bars add a festive touch to any occasion.
Remember, the joy of baking lies not just in the final product, but in the process itself. Invite friends to join in, share some laughs, and savor the satisfaction of creating something special. For more festive ideas, check out The Spruce Eats for inspiration!
PrintChristmas Cherry Bars: Easy Festive Treat to Brighten Your Holidays
These Christmas Cherry Bars are the perfect sweet treat to enjoy during the holiday season!
- Prep Time: 15 minutes
- Cook Time: 30 minutes
- Total Time: 45 minutes
- Yield: 12 bars 1x
- Category: Dessert
- Method: Baking
- Cuisine: American
- Diet: Vegetarian
Ingredients
- 1 cup all-purpose flour
- 1 cup granulated sugar
- 1/2 cup unsalted butter, softened
- 1 cup maraschino cherries, drained and chopped
- 2 large eggs
- 1 teaspoon vanilla extract
- 1/2 teaspoon baking powder
- 1/4 teaspoon salt
Instructions
- Preheat your oven to 350°F (175°C).
- In a mixing bowl, beat the butter and sugar until creamy.
- Add eggs and vanilla, and mix until well combined.
- In another bowl, combine flour, baking powder, and salt.
- Gradually add the dry ingredients to the wet ingredients.
- Fold in the chopped cherries.
- Pour the batter into a greased baking pan.
- Bake for 25-30 minutes or until a toothpick inserted in the center comes out clean.
- Allow to cool before cutting into bars.
Notes
- For extra flavor, add a pinch of almond extract.
Nutrition
- Serving Size: 1 bar
- Calories: 200
- Sugar: 18g
- Sodium: 150mg
- Fat: 8g
- Saturated Fat: 5g
- Unsaturated Fat: 2g
- Trans Fat: 0g
- Carbohydrates: 30g
- Fiber: 1g
- Protein: 3g
- Cholesterol: 40mg
Keywords: Christmas Cherry Bars