Introduction to Christmas Cherry Bars
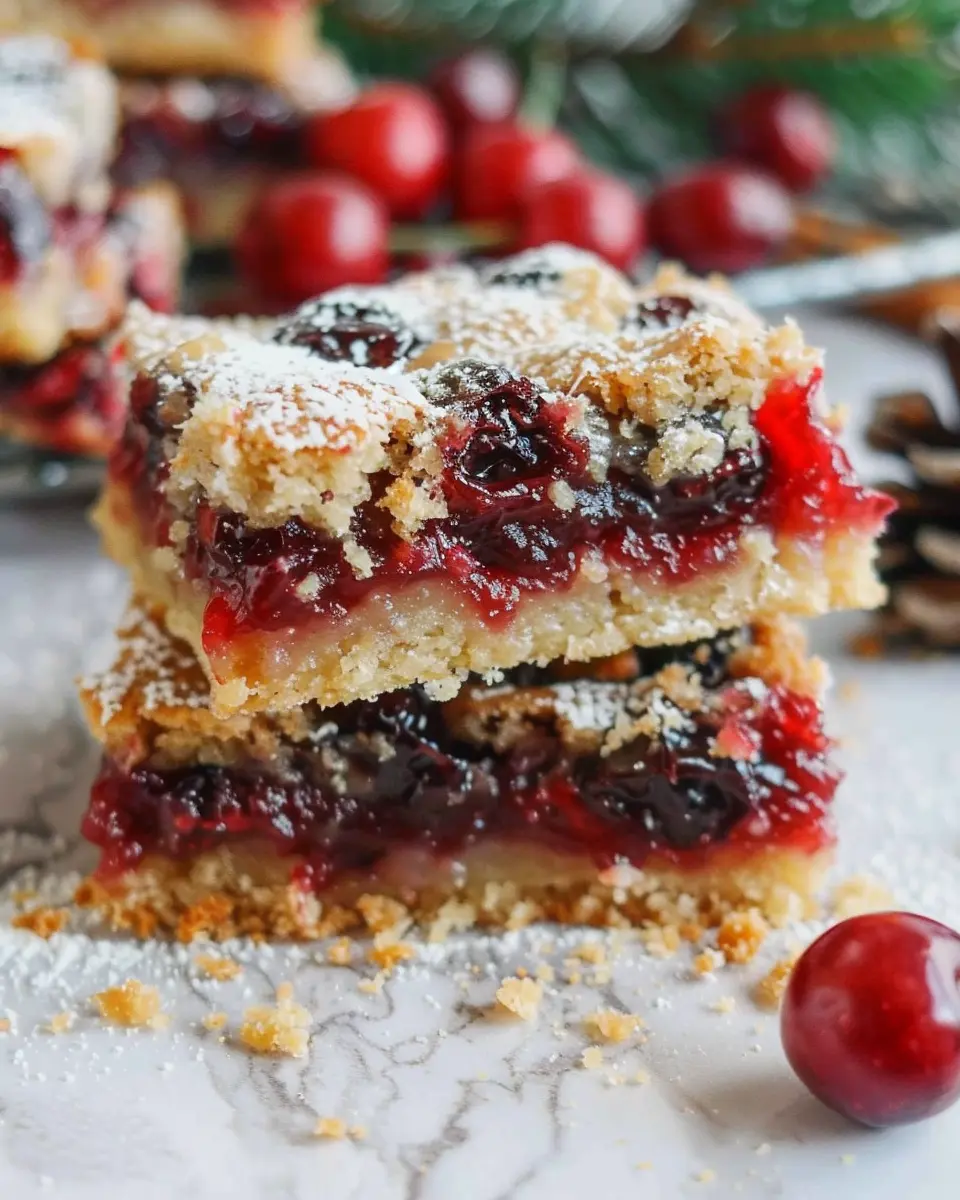
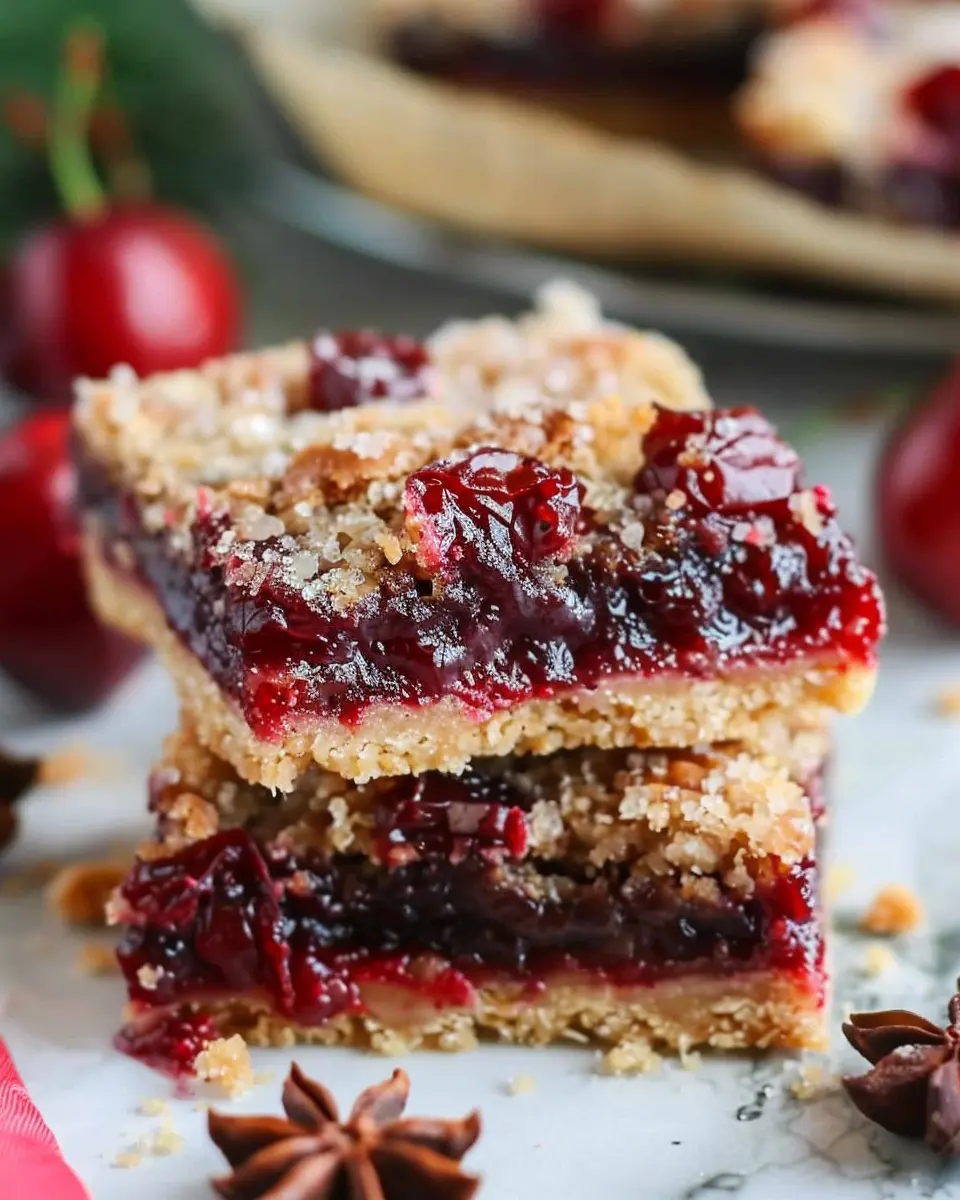
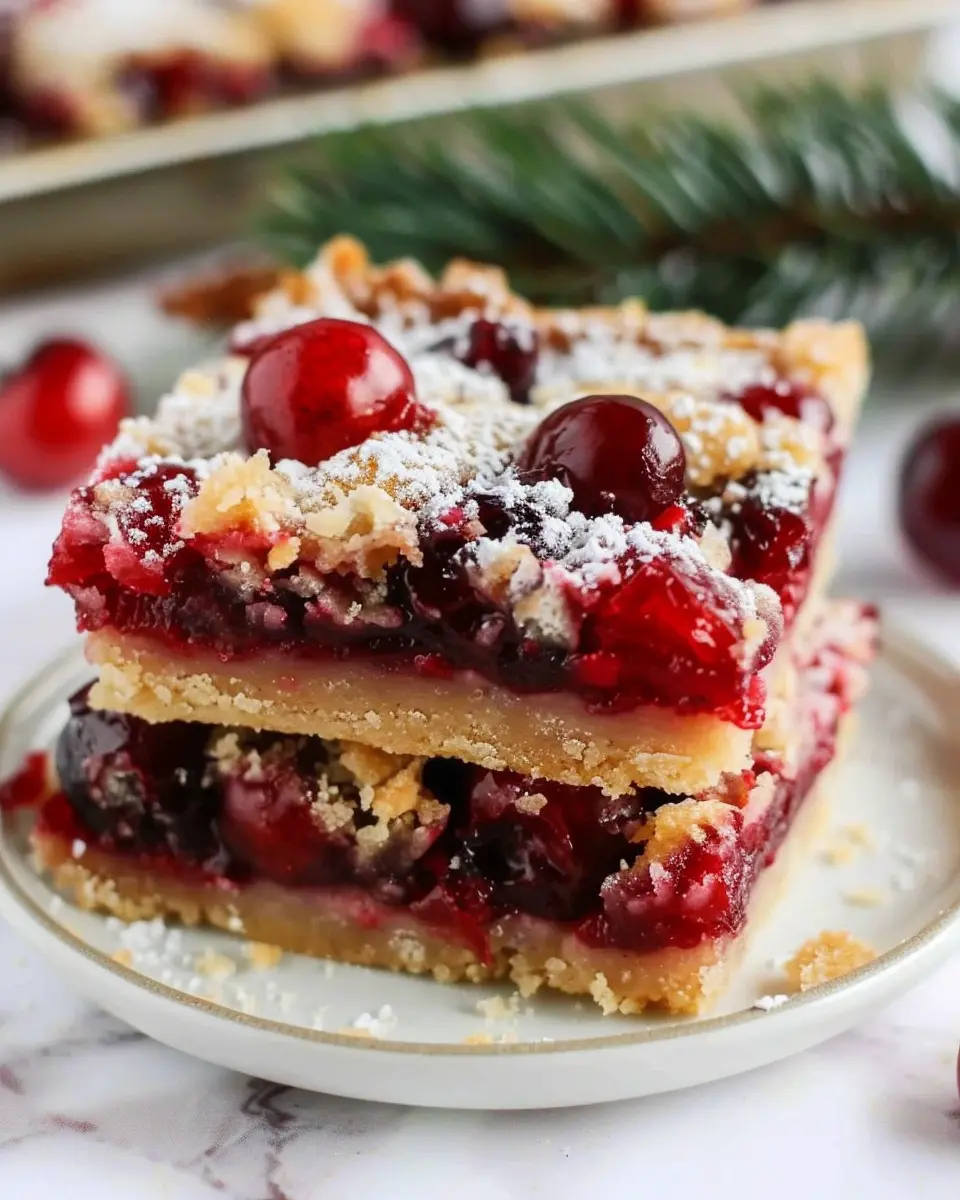
When the holiday season rolls around, it brings with it not just festive decor and cheerful gatherings, but also a whole array of incredible treats. One such delight that has become a staple in many homes is the Christmas Cherry Bars. These delightful squares are a harmonious blend of flavors and textures, and not only do they look beautiful on any dessert table, but they also deliver a vibrant burst of sweetness that can brighten anyone’s day.
Why Christmas Cherry Bars are the Perfect Holiday Treat
You might be wondering, what makes Christmas Cherry Bars stand out from other desserts? First off, their ease of preparation. Imagine gathering around the kitchen with friends or family, the scent of cherries and sugar wafting through the air as you whip up a batch. This treat is not just simple; it allows for creativity and customization. Whether you prefer a hint of almond extract blended in or a sprinkling of holiday spices, the options are endless.
Additionally, cherry bars catch the eye with their rich, red hue—perfect for festive gatherings. Our modern world leans heavily into the visual aspects of food, and the vibrant appearance of these bars can elevate any potluck or holiday party. Did you know that the color red is often associated with warmth and joy, especially during the holidays? Incorporating Christmas Cherry Bars into your celebrations could enhance that festive vibe.
Moreover, cherries are packed with antioxidants and nutrients, making them a somewhat guilt-free indulgence. Health.com notes how cherries can aid in reducing inflammation and improving sleep quality—perfect for those busy holiday weeks when we all want a little extra help in feeling our best. Find out more about the health benefits of cherries here.
In the end, what makes Christmas Cherry Bars truly special is the shared joy they inspire. As you serve them to your loved ones, you’re not just providing a sweet treat; you’re creating memories wrapped in warmth and happiness that will linger well into the New Year. As we maintain our holiday spirit, let’s dive into the recipe for these delightful bars and create something magical together!
Ingredients for Christmas Cherry Bars
Creating the perfect Christmas Cherry Bars requires just the right combination of ingredients to bring out those festive flavors. Here’s what you’ll need:
Core Ingredients
- 1 cup unsalted butter: This adds moisture and richness to your bars.
- 1 ½ cups granulated sugar: Sweetness is essential for that holiday spirit!
- 2 large eggs: They help bind everything together, ensuring your texture is just right.
- 1 teaspoon vanilla extract: A dash of vanilla elevates the flavors beautifully.
Dry Ingredients
- 2 cups all-purpose flour: The base for your bars, helping achieve a lovely crumb.
- 1 teaspoon baking powder: To give your bars that perfect lift.
- ½ teaspoon salt: A pinch of salt enhances the overall taste.
Cherry Goodness
- 2 cups pitted cherries (fresh or canned): The star of this treat! Use fresh for a burst of flavor or canned for convenience.
Optional Toppings
- Powdered sugar for dusting: A light sprinkle will make your Christmas Cherry Bars look even more festive.
- Chopped nuts (like walnuts or pecans): These add a nice crunch if you’re feeling adventurous.
Ready to dive in? With these ingredients in hand, you’re well on your way to creating a crowd-pleasing Christmas treat that everyone will adore! For more baking tips, check out resources like King Arthur Baking or Bon Appétit. Happy baking!
Preparing Christmas Cherry Bars
If you’re looking to add a delightful treat to your holiday spread, Christmas Cherry Bars are sure to be the star of the show! These sweet, tangy bars are easy to prepare, making them perfect for holiday gatherings or cozy nights at home. Let’s walk through the simple steps together, and before you know it, you’ll have a delicious dessert to share.
Preheat the oven and prepare your baking pan
Start by preheating your oven to 375°F (190°C). This is an essential step to ensure that your Christmas Cherry Bars bake evenly. While your oven is warming up, grab a 9×13-inch baking pan and lightly grease it with butter or non-stick spray. This will not only help your bars come out easily but will also prevent any sticking issues — a win-win!
Make the buttery crust mixture
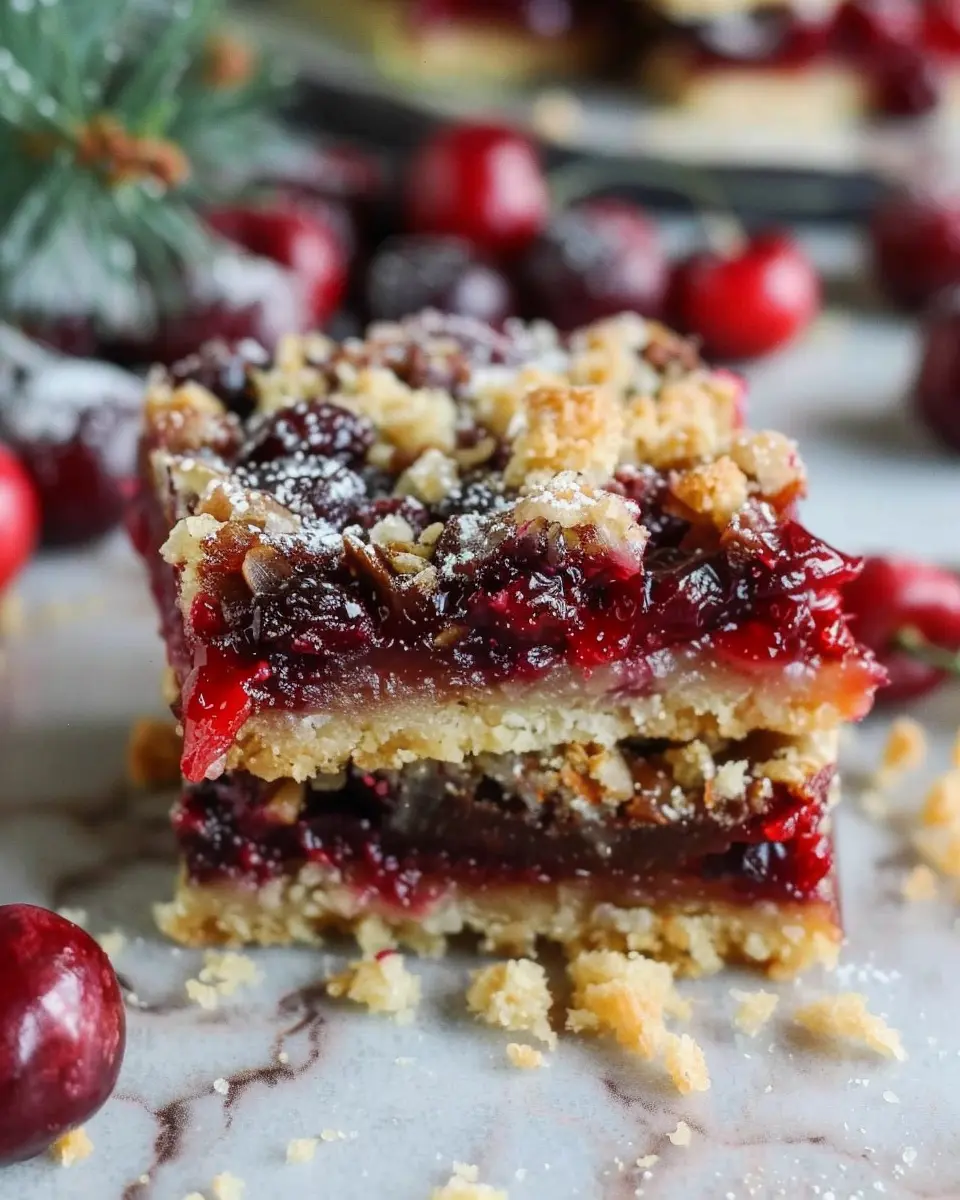
In a mixing bowl, combine 1 cup of all-purpose flour, 1 cup of oats, ½ cup of brown sugar, and ½ teaspoon of salt. Then, using a pastry cutter or your hands, mix in 1 cup of softened butter until the texture resembles coarse crumbs. The buttery goodness is what makes these Christmas Cherry Bars so delectable. Don’t worry if you get a bit messy; that’s part of the fun of baking!
Reserve crumbs for topping
Once your crust mixture is ready, take a moment to reserve about one cup of the crust mixture. You’ll use this later as a crumb topping to add that extra crunch and flavor to your cherry bars. It’s a simple step, but trust me, it makes a significant difference in texture.
Press crust into the pan
Take the remaining crust mixture and evenly spread it into the bottom of your prepared pan. Press it down firmly using your fingers or a spatula to create a nice, even layer. This foundational layer sets the stage for the cherry filling — think of it as the cozy blanket under your holiday tree.
Spread cherry filling and sprinkle remaining crumbs
Now for the magic: spoon your favorite cherry pie filling over the pressed crust. Make sure to spread it out evenly, so each bite is infused with that lovely cherry flavor. After that, take the reserved crumb mixture and sprinkle it generously over the top. This topping will caramelize beautifully in the oven, creating a delightful contrast between the smooth filling and the crispy topping.
Bake to golden perfection
With everything layered beautifully in the pan, it’s time to bake your Christmas Cherry Bars! Place them in the preheated oven and let them bake for about 30-35 minutes, or until the top is golden brown and bubbling. The aroma will fill your kitchen, making the anticipation almost unbearable — but trust me, it will be worth the wait!
Cool and cut into bars
Once baked, remove your Christmas Cherry Bars from the oven and let them cool completely in the pan. This cooling time allows the filling to set, which makes cutting much easier. Once they’re cool, use a sharp knife to cut them into squares. To elevate your presentation, sprinkle a light dusting of powdered sugar or drizzle with some warm vanilla glaze, and watch how your guests’ eyes light up!
Baking these festive Christmas Cherry Bars can become a joyful tradition in your home. Whether you enjoy them warm or at room temperature, you’ll find they pair beautifully with a cup of hot cocoa or a warm cup of spiced cider. Happy baking, and may your holidays be filled with cheer and delight! For more festive recipes, check out Food Network or AllRecipes for your next delicious adventure!
Variations on Christmas Cherry Bars
Christmas Cherry Bars are delightful treats, but why stop there? You can create exciting variations that bring a fresh twist to this classic recipe. Let’s dive into a few fun options you can whip up this holiday season.
Luscious Chocolate Drizzled Cherry Bars
For the chocolate lovers among us, drizzling warm, melted chocolate over your Christmas Cherry Bars is a game-changer!
- Ingredients: Use semisweet or dark chocolate chips for a rich taste.
- Instructions: After the bars have cooled, melt the chocolate in the microwave or over a double boiler. Drizzle it generously over the top, then let it set. This combination of sweet cherries and rich chocolate adds an indulgent layer that takes your bars from good to irresistible.
Almond Delight Cherry Bars
If you enjoy the nutty flavor of almonds, consider making cherry almond bars.
- Ingredients: Incorporate almond extract instead of vanilla for that nutty aroma.
- Instructions: Mix chopped almonds into the batter and sprinkle some on top before baking. This simple switch elevates the taste, offering a beautiful balance with the tart cherries.
Gluten-Free Cherry Bars
For those on a gluten-free journey, there’s no need to miss out on festive goodies! You can create gluten-free cherry bars with just a few adjustments.
- Ingredients: Use almond flour or a gluten-free baking blend instead of all-purpose flour.
- Instructions: Follow the same recipe but ensure you check labels for cross-contamination if you’re cooking for someone with celiac disease.
These variations aren’t just about taste; they also allow you to cater to different dietary needs. Each bite of a Christmas Cherry Bar variation can spread joy during the holidays. Need more tips or ideas? Check out this article on dessert variations for even more inspiration! Happy baking!
Baking Tips and Notes for Christmas Cherry Bars
Ensuring a Crispy Crust
When it comes to Christmas Cherry Bars, achieving that delightful crispy crust is key! Start by preheating your oven properly—this ensures even cooking. Use a high-quality baking pan; non-stick options work wonders, but you can also grease your metal pans with a bit of butter or parchment paper. For an extra crunch, consider baking the bottom layer a minute or two before adding the cherry filling; this helps it set and prevents sogginess.
Importance of Cooled Butter
You might wonder how the temperature of your ingredients affects the final product. Using cooled butter is crucial because it helps create a fluffier texture in your batter, making that ideal contrast with the sweet cherry filling. If you forget to take your butter out ahead of time, a quick method is to microwave it for about 10 seconds—check it every few seconds to ensure it doesn’t melt! This little tip can make all the difference in the final taste of your cherry bars.
Take a moment to embrace the joy of baking these treats. For more guidance, feel free to check out resources on baking techniques from Bon Appétit or King Arthur Baking. Happy baking!
Serving Suggestions for Christmas Cherry Bars
Festive Plating Ideas
When presenting your Christmas Cherry Bars, think about incorporating a burst of holiday cheer into your plating. Start with a simple white platter to make those vibrant red cherries really pop. Garnish each bar with a sprinkle of powdered sugar for a snowy touch, or add a dollop of whipped cream on the side for extra indulgence.
For a more personalized touch, consider placing them in holiday-themed cupcake liners. You can even group them on tiered stands for a lovely dessert table centerpiece.
Pairing with Hot Beverages
These Christmas Cherry Bars are versatile and can make a delightful pairing with hot beverages. Imagine relaxing by the fire with a rich cup of hot chocolate, complete with marshmallows or peppermint sticks for a festive flair.
If you prefer tea, a soothing chai or cinnamon-spiced brew can enhance the fruity notes in the bars. According to Tea Association of the USA, pairing food with the right tea can elevate flavors, making it a delightful experience.
Enjoy experimenting with your favorite drinks—what’s your go-to winter warm-up?
Time Breakdown for Christmas Cherry Bars
Preparation time
Making these delicious Christmas Cherry Bars starts with a 15-minute prep session. Gather your ingredients, including fresh cherries, and get everything ready for mixing. This is a perfect time to put on some festive music. Why not give the kitchen some holiday spirit?
Baking time
Once you have everything prepped, pop those bars in the oven for about 25 minutes. Keep an eye on them! They should be golden and firm to the touch, with that lovely cherry aroma filling the room.
Total time
In total, you’re looking at around 40 minutes from start to finish—quick enough for a last-minute holiday treat! These Christmas Cherry Bars are not only easy to make but also a delightful way to impress your friends. For step-by-step tips, check out detailed baking guides on King Arthur Baking or Serious Eats. Enjoy baking!
Nutritional Facts for Christmas Cherry Bars
When indulging in festive treats, it’s great to know what you’re savoring. Let’s break down the nutritional facts for these delightful Christmas Cherry Bars.
Calories
Each bar contains approximately 150 calories, making it a sweet treat that won’t derail your holiday diet. Perfect for satisfying your sweet tooth without overloading on calories!
Sugar Content
These bars feature around 10 grams of sugar per serving. While not sugar-free, they provide the sweetness we crave during the holidays, thanks to the natural sugars in dried cherries and added ingredients.
Other Nutritional Highlights
- Fiber: Each bar offers about 2 grams of dietary fiber, contributing to your daily intake and aiding digestion.
- Vitamins and Minerals: Packed with vitamin C and antioxidants from cherries, these bars not only taste good but also boost your health.
- Healthy Fats: If you choose to use almond butter or coconut oil, you’ll benefit from heart-healthy fats.
Want more health insights? Check out the USDA’s Nutritional Database for a deeper dive into the benefits of cherries and other ingredients. Enjoy your Christmas Cherry Bars guilt-free, knowing you’re treating yourself to something that’s both delicious and nutritious!
FAQs about Christmas Cherry Bars
How can I store leftover cherry bars?
If you find yourself with extra Christmas Cherry Bars, don’t worry—storing them is a breeze! Simply place the bars in an airtight container to maintain their moisture and keep them fresh. You can store them at room temperature for about 3-4 days, or, for longer preservation, pop them in the fridge where they can last up to a week. Want to save them for a cozy night later? Consider freezing them! Just wrap the bars tightly in plastic wrap or foil and place them in a freezer-friendly container. They’ll be good for up to three months. When you’re ready to enjoy, let them thaw at room temperature.
Can I use fresh cherries instead of pie filling?
Absolutely! Using fresh cherries can elevate your Christmas Cherry Bars to a new level. Just remember to pit and slice them up before you get started, as fresh fruit can be a tad juicier than canned pie filling. To get that signature sweet flavor, consider mixing the cherries with a bit of sugar and cornstarch to thicken as they bake. This adjustment helps achieve that luscious, gooey texture everyone loves.
What are some great toppings for cherry bars?
Topping your Christmas Cherry Bars can be just as fun as baking them! Here are a few delicious ideas to consider:
- Whipped Cream: A dollop of fresh whipped cream adds a light and airy touch.
- Powdered Sugar: A simple dusting can give your bars a festive flair.
- Chocolate Drizzle: Melted chocolate creates a decadent contrast with the tart cherries.
- Crushed Nuts: Walnuts or almonds add a satisfying crunch.
Feel free to mix and match these toppings according to your taste! Looking for unique ideas? Check out Food Network’s topping suggestions for even more inspiration.
Conclusion on Christmas Cherry Bars
Final thoughts on this festive dessert
As the holiday season approaches, indulging in Christmas Cherry Bars can truly elevate your gatherings. These vibrant treats not only please the palate but also brighten up your festive table with their delightful color and flavor. They are easy to make, allowing you to spend more time enjoying the company of friends and family.
The combination of sweet cherries and a buttery crust creates a dessert that is simply irresistible. Plus, you can customize them with variations like nuts or coconut for a unique twist. So why not bring joy to your holiday dessert table with these delightful bars? They’re sure to become a cherished recipe for years to come! For more holiday dessert inspiration, check out this guide on festive sweets.
PrintChristmas Cherry Bars: Easy, Indulgent Treats for the Holidays
Delightful Christmas Cherry Bars are the perfect indulgent treats for the festive season, combining rich flavors with a beautiful presentation.
- Prep Time: 15 minutes
- Cook Time: 35 minutes
- Total Time: 50 minutes
- Yield: 16 bars 1x
- Category: Dessert
- Method: Baking
- Cuisine: American
Ingredients
- 1 cup all-purpose flour
- 2 cups cherry pie filling
- 1/2 cup granulated sugar
- 1/4 cup unsalted butter, softened
- 1 large egg
- 1 teaspoon vanilla extract
- 1/2 teaspoon baking powder
- 1/4 teaspoon salt
Instructions
- Preheat oven to 350°F (175°C).
- In a bowl, combine flour, sugar, baking powder, and salt.
- Add softened butter, egg, and vanilla to the dry ingredients and mix well.
- Press half of the mixture into a greased 9×9 inch baking pan.
- Spread cherry pie filling over the mixture in the pan.
- Crumble the remaining dough on top of the cherry filling.
- Bake for 30-35 minutes until the top is golden brown.
- Allow cooling before slicing into bars.
Notes
- For an extra touch, drizzle with melted chocolate before serving.
Nutrition
- Serving Size: 1 bar
- Calories: 180
- Sugar: 14g
- Sodium: 100mg
- Fat: 7g
- Saturated Fat: 4g
- Unsaturated Fat: 2g
- Trans Fat: 0g
- Carbohydrates: 24g
- Fiber: 1g
- Protein: 2g
- Cholesterol: 30mg
Keywords: Christmas Cherry Bars, holiday treats, easy dessert