Introduction to Chocolate Thumbprint Cookies
The magic of chocolate thumbprint cookies
Have you ever tasted a cookie that feels like a warm hug in your hands? Chocolate thumbprint cookies deliver precisely that experience. With their rich chocolate flavor and a delightful filling of your choice—ranging from creamy peanut butter to decadent chocolate ganache—these cookies offer a heavenly bite that’s hard to resist.
The beauty of these treats lies in their simplicity. Made from basic ingredients like flour, cocoa powder, butter, and sugar, they come together quickly, allowing you to indulge your sweet tooth in no time. Have you ever wondered why thumbprint cookies have garnered such a loyal following? Part of their charm is their customizable nature. You can experiment with various fillings and toppings, making each batch uniquely your own. From fruity jams to rich creams, the creative possibilities are endless.
Why young professionals should embrace homemade treats
In our fast-paced lives, taking the time to bake may feel like a luxury that few can afford. However, embracing homemade treats like chocolate thumbprint cookies can be incredibly rewarding—and surprisingly easy. Not only will you nourish yourself with wholesome ingredients, but baking can also serve as a perfect stress reliever after a long day at the office.
According to a study from the American Psychological Association, activities like baking can significantly reduce anxiety, giving you a much-needed mental breather. Plus, nothing beats the satisfaction of sharing these delicious cookies with friends or colleagues. Imagine walking into work with a plate full of freshly baked cookies and witnessing your coworkers’ faces light up as they dig in.
Homemade treats offer several benefits:
- They’re healthier than store-bought options, lacking the preservatives and artificial ingredients.
- You can control the sweetness level and tailor flavors to your preferences.
- It’s a fun, creative outlet that can become a cherished hobby.
Next time you’re seeking a unique way to express your creativity or simply craving something sweet, turn to these chocolate thumbprint cookies. Not only are they easy to make, but they also bring joy to you and those around you. Happy baking!
Ingredients for Chocolate Thumbprint Cookies
Essential ingredients for cookie perfection
To create irresistible chocolate thumbprint cookies, you’ll need some key ingredients that not only ensure better flavor but also enhance the texture. Here’s what you’ll want to gather:
- All-purpose flour: This is the backbone of any cookie. It gives your thumbprints structure.
- Unsweetened cocoa powder: For that rich chocolate flavor that complements the sweetness perfectly.
- Granulated sugar and brown sugar: A mix of both adds depth to the sweetness and moisture to the dough.
- Butter: Using unsalted butter will allow you to control the salt levels while lending a rich creaminess to your cookies.
- Egg yolk: This is your secret weapon for added richness and chewiness in every bite.
- Salt and baking powder: Essential for balancing flavors and helping your cookies rise a bit while baking.
Importance of choosing high-quality chocolate
Don’t underestimate the power of good chocolate when it comes to your thumbprint filling. Opt for premium chocolate chips or bars—your taste buds will thank you! High-quality chocolate ensures a smoother melting consistency, rich taste, and overall better results. Look for options with at least 60% cocoa content, as they bring a delightful bitterness that pairs beautifully with the sweetness of the cookie.
If you’re interested in learning more about chocolate quality, check out sources like the Chocolate Manufacturers Association to deepen your knowledge!
Elevate your chocolate thumbprint cookies with these ingredients, and get ready to impress everyone at your next gathering!
Preparing Chocolate Thumbprint Cookies
When you think of cozy baking sessions, few treats resonate quite like chocolate thumbprint cookies. These delightful confections bring a touch of nostalgia and are sure to impress friends and family alike. But how do you create that perfect bite of chocolatey goodness? Fear not! Let’s walk through the steps together.
Gather your baking essentials
First things first—let’s round up the essentials. Here’s what you’ll need to create these scrumptious cookies:
- Flour (all-purpose)
- Cocoa powder (for that rich chocolate flavor)
- Baking powder (to give our cookies that nice lift)
- Salt (to balance the sweetness)
- Unsalted butter (softened, for the perfect texture)
- Granulated and brown sugars
- Egg yolks (adds richness)
- Vanilla extract (the magic ingredient)
- Chocolate ganache ingredients (heavy cream and chocolate)
Having everything lined up from start to finish can make your baking process much more enjoyable. Plus, it’s a great time to preheat your oven to 350°F (175°C).
Whisk together dry ingredients
In a large bowl, whisk together your dry ingredients: flour, cocoa powder, baking powder, and salt. This step not only combines everything evenly but also helps aerate the mixture, leading to a lighter cookie. If you’re wondering why whisking is important, think of it like this: evenly combined dry ingredients lead to uniform baking, ensuring every cookie comes out just right.
Cream butter and sugars
Next, grab another bowl and combine the softened butter with granulated and brown sugars. Using an electric mixer or a good ol’ wooden spoon, cream these together until the mixture is light and fluffy. This process incorporates air, which gives your cookies that delightful texture we all crave. If you’ve ever wondered how crucial this step is to the overall outcome, consider that properly creamed butter and sugar could be the secret to melt-in-your-mouth softness.
Incorporate egg yolks and vanilla
After achieving that fabulous buttery blend, it’s time to add the egg yolks and vanilla extract. These ingredients not only contribute to the rich flavor profile of the dough but also strengthen its structure. Give it a good mix after adding—this is where those heavenly aromas start filling your kitchen!
Bring it all together
Gradually add your dry mixture to the wet ingredients. Stir gently but thoroughly until just combined. You don’t want to overmix it; a few lumps are perfectly okay. Remember, the goal here is to create chocolate thumbprint cookies that are tender, not tough.
Shape the cookies and make indents
Now, it’s time to shape your dough into small balls, about one inch in diameter. Place them onto a baking sheet lined with parchment paper for easy cleanup. Here’s the fun part—using your thumb (or the back of a spoon), gently press into the center of each ball to make a small indent.
Chill the dough for optimal texture
Once shaped, cover the baking sheet with plastic wrap and chill the dough in the refrigerator for about 30 minutes. Chilling not only helps firm up the dough but also enhances the flavor—an essential step you won’t want to skip!
Bake the cookies to chewy perfection
After chilling, pop those beauties into your preheated oven and bake for 10-12 minutes. Keep an eye on them; to achieve that chewy texture we all love, you might want to pull them out when they are just set.
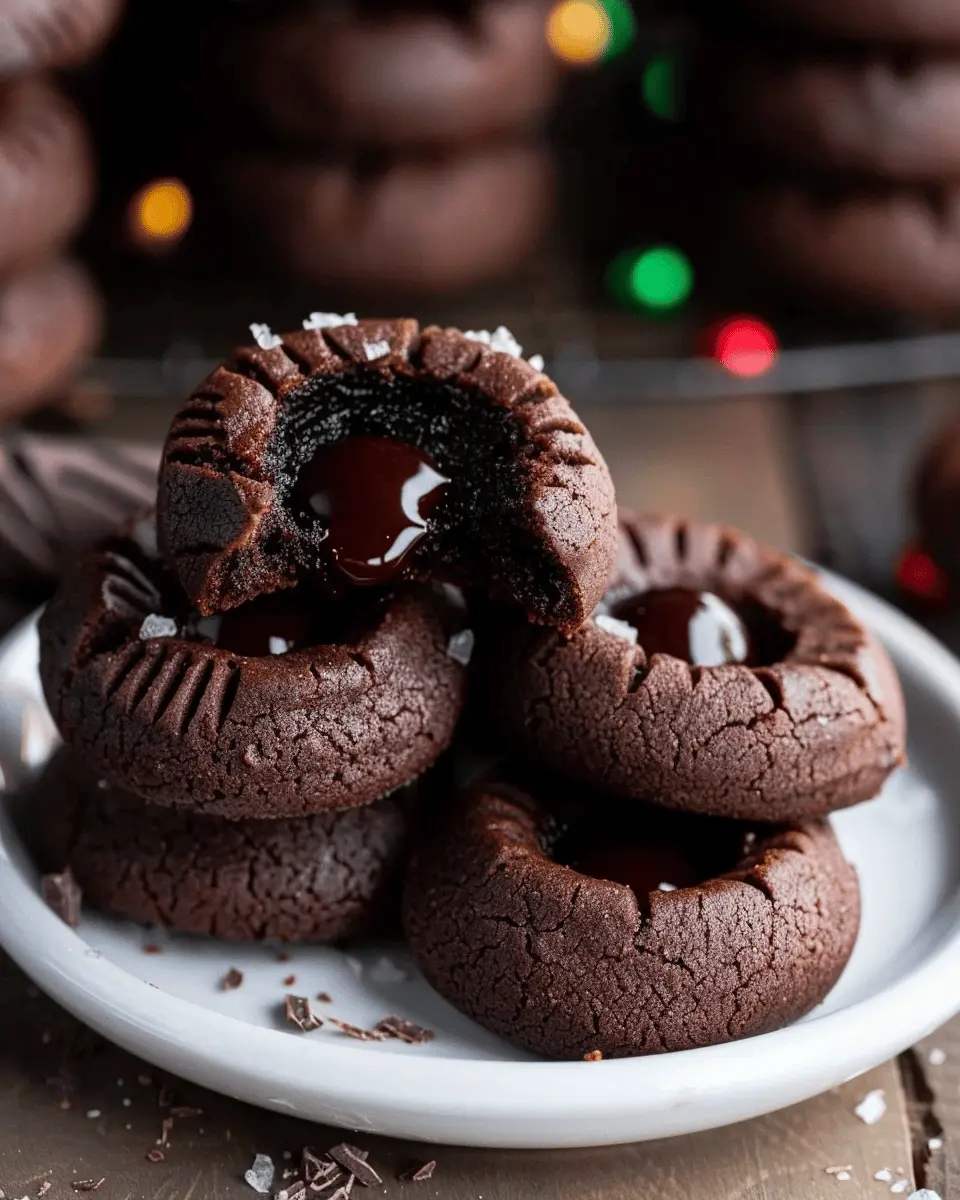
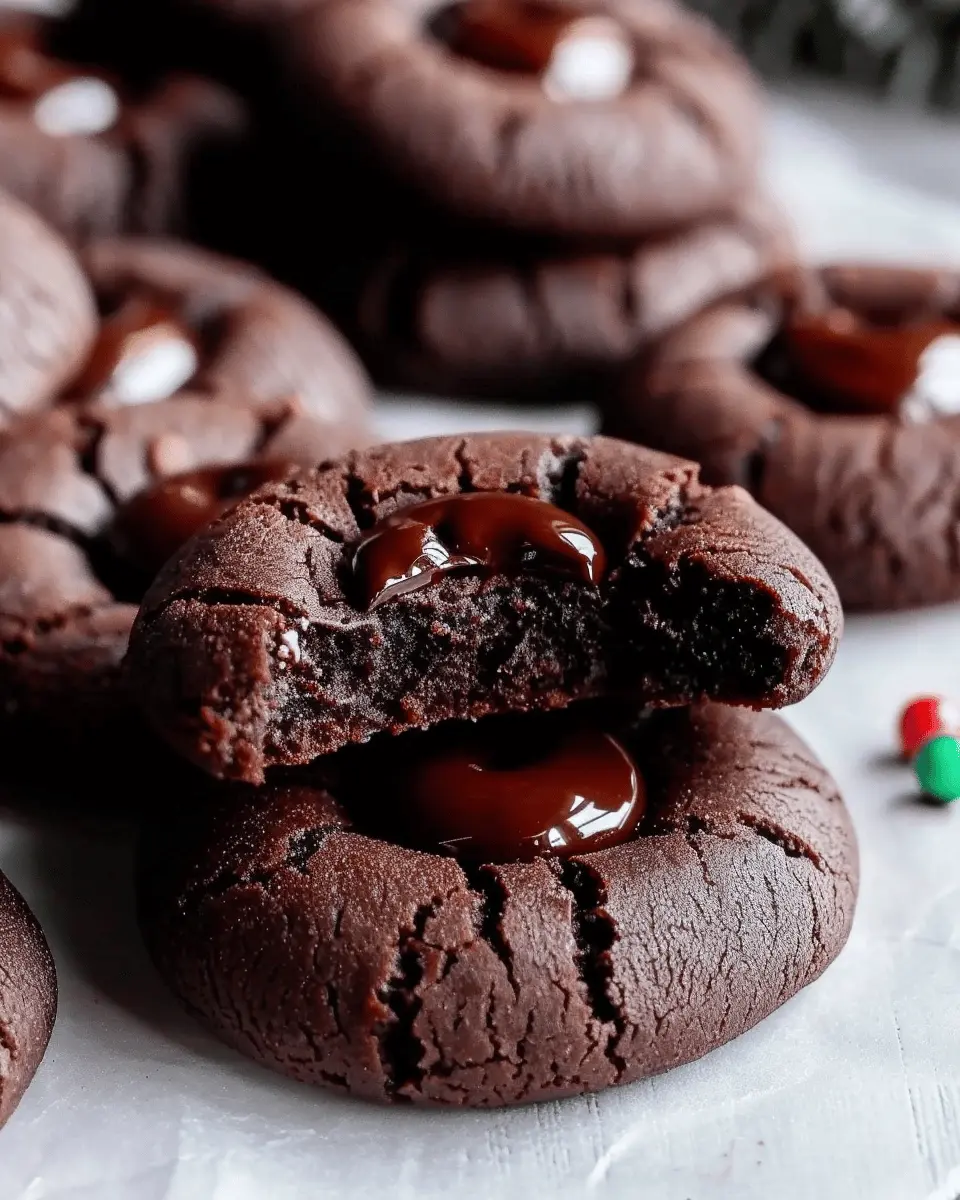
Prepare and add the ganache
While waiting for those cookies to cool, prepare your chocolate ganache. Heat heavy cream until just simmering, then pour it over chopped chocolate. Let it sit for a minute before stirring to create a silky-smooth ganache. Once your cookies are cool, generously fill the indents with this luscious chocolate goodness.
Finish and chill the cookies
For an ultimate treat, place your filled cookies in the refrigerator to allow the ganache to set. It makes each bite a delightful surprise of creamy chocolate.
So, there you have it—your guide to preparing chocolate thumbprint cookies. Who says you can’t treat yourself to the sweet side of life? Enjoy your baking adventure and savor each delicious moment!
Variations on Chocolate Thumbprint Cookies
Chocolate thumbprint cookies are a delightful canvas for creativity! Let’s explore different ways to elevate this classic treat and cater to your taste buds.
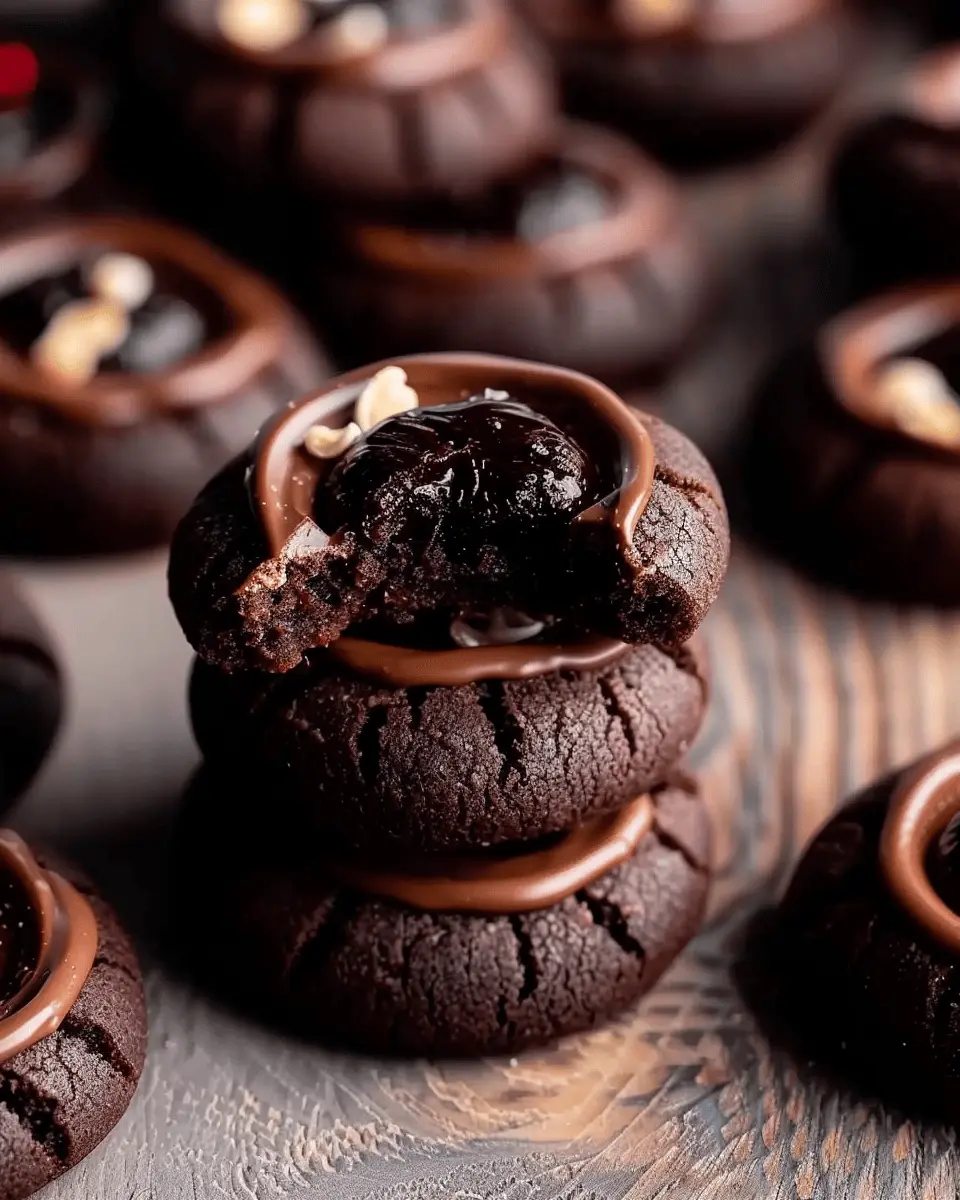
Peanut Butter Ganache Center
For a rich twist, consider filling your chocolate thumbprint cookies with a luscious peanut butter ganache. Simply combine equal parts of creamy peanut butter and melted chocolate. Once your cookies are baked and cooled, create a small indentation and spoon or pipe the ganache into the center. The creamy texture pairs heavenly with the crumbly cookie, adding a delightful contrast you won’t want to miss.
Adding a Hint of Spice with Chili Powder
If you’re feeling adventurous, add a dash of chili powder to the cookie dough or ganache to incorporate a subtle kick. This unexpected twist not only enhances the chocolate flavor but also adds depth. It’s a fascinating combination that’s been trending recently and can be dreamily complemented with a sprinkle of coarse sea salt on top.
Swapping Dark Chocolate for Milk Chocolate
While dark chocolate provides a rich, intense flavor, swapping it for milk chocolate can result in cookies that are sweeter and creamier. Whether you use milk chocolate chips or a finely chopped bar, your chocolate thumbprint cookies will take on a whole new vibe that’s perfect for the sweeter palate. You might even want to try combining both for the best of both worlds!
Ready to experiment? Each variation opens up a world of flavors, making it easier to impress friends and family. Curious for more ideas? Check out The Kitchn for even more creative baking inspirations!
Baking Notes for Chocolate Thumbprint Cookies
Common Pitfalls to Avoid
Baking chocolate thumbprint cookies might seem straightforward, but several common mistakes can trip you up. First, be careful not to overmix your dough. Doing so can lead to tough cookies rather than the melt-in-your-mouth texture you desire. Another issue is baking time; keep an eye on your cookies to avoid overbaking. They should be firm yet soft to the touch when you take them out of the oven.
Lastly, make sure to chill your dough adequately. This helps the cookies hold their shape during baking, resulting in perfectly formed chocolate thumbprint cookies that look as good as they taste. For additional tips, check out this helpful guide on common baking mistakes.
Importance of Precise Measurements for Baking Success
Baking is often compared to science, and precise measurements are crucial for chocolate thumbprint cookies. Using a kitchen scale can help you achieve the perfect cookie ratio, ensuring that each ingredient works harmoniously when baked. Even slight deviations can lead to different textures or flavors. Don’t underestimate the importance of following the recipe accurately to ensure your cookies turn out delicious every time!
For instance, if you’re curious about measuring different ingredients, the American Baking Guild provides comprehensive resources that can help.
Serving Suggestions for Chocolate Thumbprint Cookies
Pairing with Coffee or Tea
When you think of chocolate thumbprint cookies, the first thing that might come to mind is a cozy afternoon treat. Why not elevate that experience by pairing these delightful cookies with a warm cup of coffee or herbal tea? A rich espresso brings out the cocoa flavors beautifully, while a soothing chamomile tea can balance the sweetness. For those adventurous souls, why not try a matcha latte? Its earthy notes complement the chocolate nicely, creating a sensory delight. You can discover more about successful food pairings at The Spruce Eats, which offers valuable insights on harmonizing flavors.
Presentation Ideas for Special Occasions
Looking to impress your friends at a gathering? Present your chocolate thumbprint cookies on a memorable platter or tiered stand. Consider sprinkling some edible gold dust for a chic effect or arranging them in beautiful cupcake liners. If you’re hosting a holiday get-together, consider a festive theme: think silver and gold for New Year’s or a colorful display with seasonal fruits. Adding a personalized touch, like a handwritten recipe card next to the cookies, can make your setup feel extra special. Creative presentation can turn even simple cookies into a centerpiece, making your event one to remember!
Remember, these suggestions not only enhance enjoyment but also demonstrate a thoughtful approach to hosting. So, how will you serve your chocolate thumbprint cookies next time?
Tips for Making Perfect Chocolate Thumbprint Cookies
When it comes to baking chocolate thumbprint cookies, achieving the ideal texture and taste can feel daunting. But don’t worry! With a few insider tips, you’ll be well on your way to cookie perfection.
Cooling Techniques for the Best Texture
Cooling your cookies properly is crucial in maintaining their delectable texture. After baking, transfer the cookies to a wire rack. This allows air to circulate evenly, preventing sogginess. If you want to boost the chewy factor, try placing them in the fridge for about 10 minutes after they’ve cooled on the rack. This little trick can help the cookies set up nicely without losing their soft center.
Storing Cookies to Maintain Freshness
Storing your chocolate thumbprint cookies properly is key to keeping them fresh. Use an airtight container lined with parchment paper to prevent them from sticking together. Adding a slice of bread to the container can help absorb moisture, keeping the cookies soft for days. A well-maintained environment can extend their freshness for up to a week — perfect for enjoying a treat at any time!
For more tips on cookie recipes, check out Joy of Baking or Serious Eats for a wealth of baking resources. Happy baking!
Time details for Chocolate Thumbprint Cookies
Preparation time
Getting ready to bake your chocolate thumbprint cookies is a breeze! You’ll need about 20 minutes to mix the ingredients and form the dough. Don’t worry; it’s straightforward, and the smell of chocolate will keep you motivated!
Chilling time
Chilling the dough is essential for the perfect texture. Plan for about 30 minutes in the refrigerator. This step is crucial as it ensures your cookies hold their shape while baking.
Baking time
Now comes the best part! Bake your cookies for 12-15 minutes. Keep an eye on them; you want the edges firm, but the centers should stay a tad soft for that delightful chewy texture.
Total time
In total, you’re looking at around 1 hour to whip up these delicious chocolate thumbprint cookies. Between preparation, chilling, and baking, it’s a small investment for a sweet treat that’s sure to impress. Enjoy the process and don’t forget to savor every bite!
For more tips on baking cookies, check out this helpful resource from King Arthur Baking.
Nutritional information for Chocolate Thumbprint Cookies
Calories per cookie
Each Chocolate Thumbprint Cookie contains approximately 100 calories, making them a delightful treat that won’t derail your day.
Breakdown of key nutrients
These cookies provide not just sweetness but also key nutrients, including:
- Fat: About 5g, primarily from the butter or coconut oil
- Carbohydrates: Roughly 12g, depending on the sugar content
- Protein: Around 1g, thanks to the flour and any added nuts
- Fiber: About 0.5g per cookie, which can be improved by using whole grain flour
Dietary considerations
For those on specific diets, these chocolate thumbprint cookies can be easily modified. You can substitute gluten-free flour or use plant-based butter for a vegan option. Plus, consider swapping out regular sugar for a natural sweetener to lower the glycemic index.
For a deeper dive into nutritional health, check out resources from the American Heart Association. Make these treats work for you!
FAQs about Chocolate Thumbprint Cookies
Can I make these cookies gluten-free?
Absolutely! You can enjoy chocolate thumbprint cookies without gluten by substituting all-purpose flour with a gluten-free flour blend. Look for blends that mimic the texture of regular flour, such as those containing rice flour, almond flour, or a combination of gluten-free ingredients. Just remember to check that all your other ingredients, like chocolate or nut toppings, are also gluten-free. This way, everyone can indulge in this delightful treat!
How do I fix cookies that spread too much?
If your chocolate thumbprint cookies are spreading more than you’d like, there are a few common culprits to consider:
- Chilled Dough: Make sure your dough is well-chilled before baking. If it’s too soft, it will spread excessively in the oven.
- Measuring Flour: Use the proper technique for measuring flour. Spoon it into your measuring cup and level it off—this prevents adding too much moisture.
- Oven Temperature: Ensure your oven is correctly calibrated. An oven that’s too low can cause cookies to spread before they set. Consider using an oven thermometer for accuracy.
What can I substitute for eggs in this recipe?
If you’re looking to make your chocolate thumbprint cookies egg-free, there are several effective substitutes:
- Flaxseed Meal: Mix 1 tablespoon of flaxseed meal with 2.5 tablespoons of water. Let it sit for about 5 minutes until it thickens, and use it in place of one egg.
- Applesauce: Use 1/4 cup of unsweetened applesauce per egg. This will help bind your cookies while adding a touch of sweetness.
- Mashed Bananas: Similar to applesauce, 1/4 cup of mashed banana can replace one egg. Just be mindful of the banana flavor!
For more alternatives, check out resources like the Humane Society which often shares creative egg substitutes.
With these tips, you’ll be well on your way to creating the perfect batch of chocolate thumbprint cookies! Whether you’re hitting a gluten-free note or experimenting with egg alternatives, there’s room for everyone to enjoy these delightful bites. Happy baking!
Conclusion on Chocolate Thumbprint Cookies
Recap of the joys of homemade cookies
There’s something immensely satisfying about creating your own desserts, especially with chocolate thumbprint cookies. From the rich, gooey center to the crisp edges, each bite bursts with flavor and nostalgia. Baking at home allows you to tailor recipes to your preferences, experiment with ingredients, and share delightful results with friends and family. It’s not just about eating cookies; it’s about making memories and connecting with those you love.
Encouragement for readers to explore their baking journey
So, whether you’re a seasoned baker or just starting out, don’t hesitate to dive into your baking journey! Each batch you whip up is a chance to learn and grow. Challenge yourself with variations or new flavors—who knows what delicious creations await? Embrace the messiness of baking and enjoy every moment. For more tips and ideas, check out resources like King Arthur Baking and Serious Eats to expand your skill set and enjoy the sweet rewards of your efforts.
PrintChocolate Thumbprint Cookies: The Best Indulgent Treat for You

Indulge in the rich and delightful flavor of Chocolate Thumbprint Cookies that will satisfy your sweet tooth.
- Prep Time: 20 minutes
- Cook Time: 12 minutes
- Total Time: 32 minutes
- Yield: 24 cookies 1x
- Category: Dessert
- Method: Baking
- Cuisine: American
- Diet: Vegetarian
Ingredients
- 1 cup unsalted butter
- 1 cup granulated sugar
- 2 cups all-purpose flour
- 1/2 cup unsweetened cocoa powder
- 1/4 teaspoon salt
- 1 teaspoon vanilla extract
- 1/2 cup chocolate chips
Instructions
- Preheat your oven to 350°F (175°C).
- In a mixing bowl, cream together the butter and sugar until light and fluffy.
- Mix in the flour, cocoa powder, and salt until just combined.
- Stir in the vanilla extract.
- Roll the dough into small balls and place them on a baking sheet.
- Make an indentation in the center of each cookie.
- Bake for 10-12 minutes, then remove from the oven.
- Fill each indentation with chocolate chips while the cookies are still warm.
- Let cool before serving.
Notes
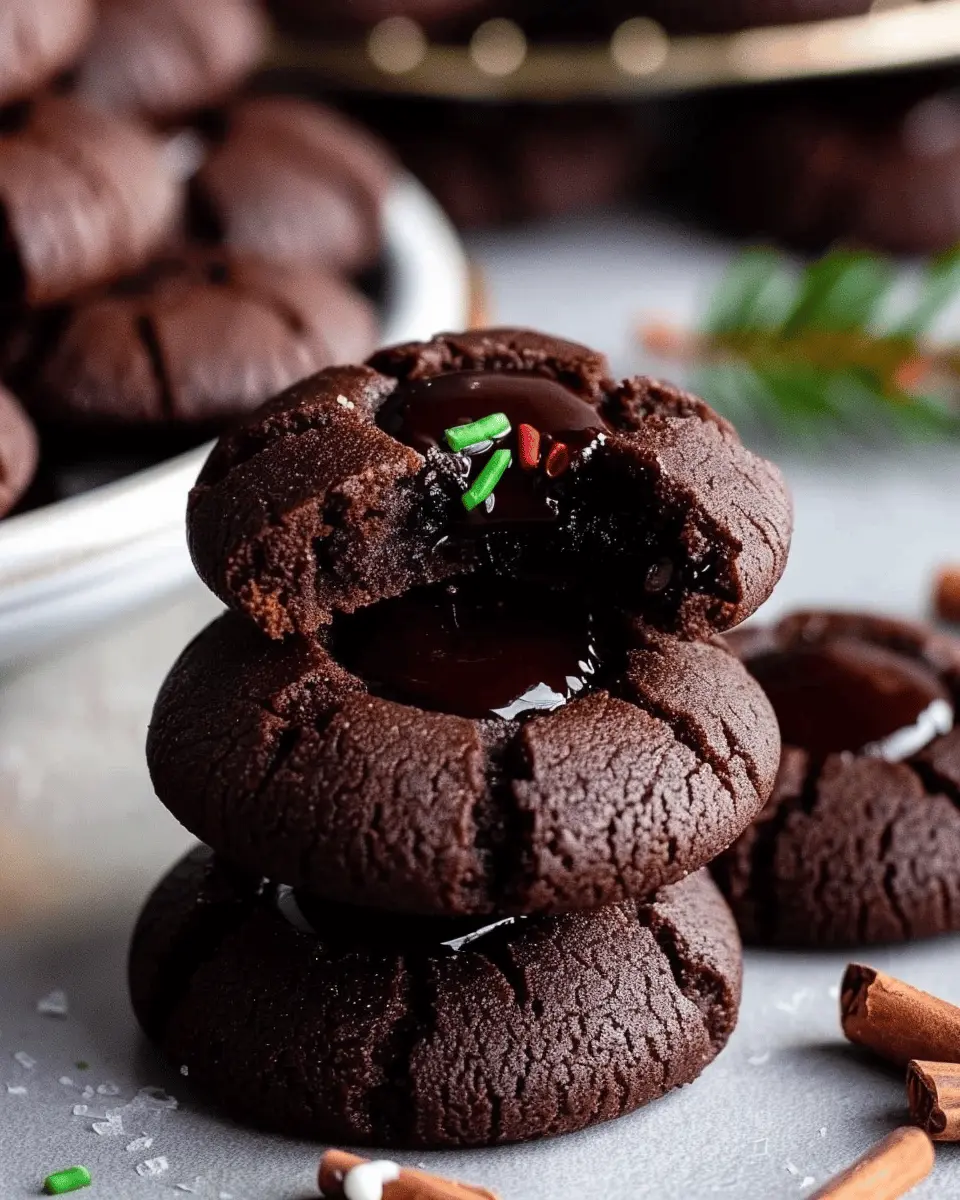
- For extra flavor, add a pinch of cinnamon.
- These cookies can be decorated with sprinkles for a festive touch.
Nutrition
- Serving Size: 1 cookie
- Calories: 150
- Sugar: 10g
- Sodium: 50mg
- Fat: 8g
- Saturated Fat: 5g
- Unsaturated Fat: 3g
- Trans Fat: 0g
- Carbohydrates: 18g
- Fiber: 1g
- Protein: 2g
- Cholesterol: 30mg
Keywords: Chocolate Thumbprint Cookies